Pages

Wednesday, July 31, 2013

Cardmaking Series Part 2: Embossing

Welcome back to the card making series :)
Last time, we learned about making simple cards, using just stamps and paper.
This week we are going to take it up a notch and talk about embossing to dress up your cards.  Embossing is a great way to add some glam or sparkle to your cards and make them stand out.
The process is really simple, but will require a few new supplies
(these links are NOT affiliate links, I'm just trying to show you some examples)
To do embossing, you will need


You can emboss using any stamp that you have.
To emboss, you simply take your stamp, using the embossing ink (or regular ink) and stamp your design on the paper.  Moving quickly, sprinkle the embossing powder on the wet ink.  The embossing powder should stick to the ink.  Tilt the paper and tap gently to remove the excess powder.  I use am embossing tray to so that I don't waste any powder.
Then using an embossing gun (or toaster, or hair dryer, or other heat source), you heat up the embossing powder until it just melts and becomes shiny (overheating can cause it to look burned - and be careful of your fingers!).  And that's it!
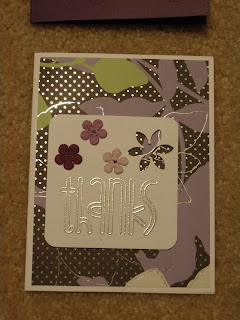
Here are some examples of cards that I have used embossing powder on.

The colored glitter in these one were done with a glitter glue like pen called Stickles.


Linking up here:
Wednesday
Create and ShareSugar and SpiceWhat I Whipped UpWhatever Goes WednesdayShow me what ya GotLil LunaWow me Wesdnesday{Wow Me} WednesdayCast PartyYour Whims WednesdayFluster's Creative MusterWednesday WhatsitShow and ShareDream to Reality, Wow Us Wednesday, Super Linky PartyWhat We Wore, Read, and Made, Whatcha Work-Up, A Little Bird Told Me, And Sew We Craft TogetherWe did it!, We Made that!, Two Girls and a Party
Thursday
Hooking up with HoHCatch a GlimpseCreative JuiceChic and CraftyThursday Favorite Things, Live Laugh LinkyCreative PrincessShare your Cup, , Linky PartyLink it UpMade you Look, Inspiration in ProgressBlog StalkingWildly OriginalShowcase your TalentSomewhat SimpleKeep Calm and Link UpFive Little ChefsCommercial BreakLamberts Lately
Friday
Show and Tell FridayFriday FavoritesSimply CreateLovely Crafty WeekendEBKTSWeekend WanderWeekend Show OffWeekend Bloggy ReadingFlaunt it Friday504 MainFriday FavsFancy This Friday, Flash Blog Friday, Finished FridayFreedom FridayShow off Friday, Happy HourKeep Calm and Link Up, Weekend Wonders, I'm loving it, Fiday FavsPity Party, Dare to Share, F Friday, Craftionary Link Party, Do Something Crafty, Get CraftyShine on Friday!
Weekend
Weekend Wrap UpSay G'daySaturday SpotlightStrut Your StuffCheck me Out Show and TellSaturday Spotlight,  Your Great IdeaSimply Sweet SaturdayShare it SaturdaySaturday Show and Tell,  No Rules Blog PartyCraft Create Inspire,  Sunday ScoopSunday ShowcaseThink PinkNifty Thrifty SundayNot Baaad SundayThat DIY Party,  Overflowing with Creativity PartyA Bouquet of TalentWeekend Creative

Monday

Monday, July 29, 2013

Frosted Slice and Bake Cookies

I'm back from Canada!  I had a lovely trip with my really good friend :)  While I missed my husband, it was nice to go adventuring again and visit somewhere new.  I'll be sharing some pictures and stories with you soon.  
Now that I'm back, of course I'm busy again in the kitchen.  It's been nice around here!  The weather has been more like fall then mid summer, I for one, enjoy the 70s much better than the 90s!  It means I can turn on my oven, and I sure have.
The recipe I'm sharing with you today is super easy :)  I actually made the dough before I went to Canada and then it was already for me to bake up for a sweet treat right when I got home.  Love cookies that can be made ahead like that.  These are also so simple because they don't involve any rolling out of dough.  Great for when you need a cookie in a hurry.  The dough can be made ahead of time and frozen for up to three months.  These were delicious and I plan to stock my freezer with some more dough to have on hand.
Now let's get to it!  

Frosted Slice and Bake Cookies
Recipe adapted from Shugary Sweets
Ingrediants:

  • 1 cup sugar
  • 1 tsp vanilla
  • 1 cup unsalted butter (make sure to let it soften first!)
  • 1 egg
  • 1 tsp almond extract
  • 3 cups flour
  • 1/2 tsp salt
  • 2 tsp baking powder
  • 2 TBSP milk
Frosting

  • 3 cups powdered sugar
  • 1/3 cup milk
  • 1 tsp desired flavoring (I used vanilla again, but you can use lemon, almond, whatever)
  • Sprinkles!!!

Directions:
Cream the butter and sugar, and vanilla extract together, mixing about 2-3 minutes.  Add egg and almond extract.  Beat in the flour, salt, milk, and baking powder.  Mix well.  Divide the dough in half and roll into a log (the thickness of the log will be how wide your cookies are, Mine were about 2 inches thick).  Wrap in plastic wrap and place in freezer for at least 3 hours, overnight, or up to a few months.
When you are ready to bake your cookies, no need to thaw that dough!  Take straight from the freezer and slice off 1/4 inch thick cookies.  Bake at 350 degrees for 9-11 minutes.  Let cool completely.
Mix up the frosting by whisking together the powdered sugar, extract of choice, and milk until smooth.  I spread the frosting on using the back of a spoon, or you can dip the front of the cookie in the glaze, or use a basting brush - up to you!  Add sprinkle after every few cookies.  Let the frosting set at least 30 minutes.  Store in airtight container.  Enjoy!
I'm participating in Fill the Cookie Jar!


Linking up here:

Monday
Tuesday
Anti-Procrastination Tuesday, Homemade TuesdayNifty Thrifty TuesdayTake a Look TuesdayToo Cute TuesdayOne Project at a TimeTasteful TuesdayTell me TuesdayTrick or Treat Tuesday,Tuesday Talent ShowTwo Cup TuesdayMemories by the MileTotally Tasteful TuesdaysTuesday ConfessionalTime for You Tuesday, Gathering Spot, Take it On Tuesday, You're Gonna Love it Tuesday, All my Bloggy FriendsTuesday to DoPin it TuesdayTasty Tuesday
Wednesday
Create and ShareSugar and SpiceWhat I Whipped UpWhatever Goes WednesdayShow me what ya GotLil LunaWow me Wesdnesday{Wow Me} WednesdayCast PartyRecipe RoundupYour Whims WednesdayWhat's Cooking WednesdayFluster's Creative MusterWednesday WhatsitShow and ShareDream to Reality, Wow Us Wednesday, What We Wore, Read, and Made, Whatcha Work-Up, A Little Bird Told Me,
Thursday
Friday
Weekend re-TreatFoodie FridayShow and Tell FridayFriday FavoritesSimply CreateLovely Crafty WeekendEBKTSWeekend WanderWeekend Show OffWeekend Bloggy ReadingFlaunt it Friday504 MainFriday FavsFancy This Friday, Flash Blog Friday, Finished FridayFreedom FridayShow off Friday, Happy HourKeep Calm and Link Up, Weekend Wonders,
Weekend
Weekend Wrap UpSay G'dayStrut Your StuffCheck me Out Show and TellSaturday SpotlightGreat IdeasYour Great IdeaSimply Sweet SaturdayShare it SaturdaySaturday Show and TellSunday ScoopSunday ShowcaseThink PinkNifty Thrifty SundayNot Baaad SundayScrumptious Sunday Recipe Link PartyThat DIY Party,Overflowing with Creativity PartyA Bouquet of TalentWill Cook for Smiles

Monday, July 22, 2013

Guest posting today!

Good morning!
Today I am guest posting for Amy over @ The Stitchin' Mommy, sharing a cute apron that I made for my best friend's birthday!
I'm roadtripping in Canada with my friend right now, so please check out my guest post.
Have a great day and I will be back from my vacation soon!

Wednesday, July 17, 2013

Cardmaking Basics Part 1 - paper and stamping

Welcome to part 1 in my cardmaking series!  I leave for Canada in a few days, so you may not see me around the blog much in the next week or so, we'll see how much Internet I find!  In the meantime, be sure to explore around and learn some more about cardmaking!
I'm going to try my best to keep this series organized, we'll see how it goes. :)
Today I wanted to share some very simple cards with you.  Great for if you are just getting started making cards or if you need to make a whole bunch of a cards in a hurry.

What you need:

  • 8 1/2 x 11 inch white cardstock
  • Scrapbook paper
  • Adhesive
  • Scrap paper
  • Stamp (Thank You)
  • Ink


What to do:
First, (obviously :), cut your white cardstock in half and fold into two cards.
Next, take your scrapbook paper, and cut it to mat size - Cut it so that a little of the white edge of the card shows and forms a "mat" around your scrapbook paper.  This usually means cutting the paper to 4 inches x 5 1/4 inches.  Adhere the mat to your card.
Measure your stamp and stamp on your scrap paper.  Make sure to let the ink dry before adhering your sentiment to your card.  Get creative - you can make small or large banners with you sentiments.  Place your banner diagonally.  Or even create a banner at the bottom of the card.  It's all up to you!


*Note - sayings (such as Thank You, Love You, Miss You, Thinking of You, etc are called sentiments)

Some more examples :)

As part of this post, I'm also doing my first linky!
Here's the (simple!) rules
  • Link up a SIMPLE card - it can only use stamp/ink/paper - no other embellishments (we'll get more complicated cards later in this series)
  • Feel free to visit other links and get ideas for your own cards.


Happy card making!

Linking up:
Wednesday
Create and ShareSugar and SpiceWhat I Whipped UpWhatever Goes WednesdayShow me what ya GotLil LunaWow me Wesdnesday{Wow Me} WednesdayCast PartyYour Whims WednesdayFluster's Creative MusterWednesday WhatsitShow and ShareDream to Reality, Wow Us Wednesday, Super Linky PartyWhat We Wore, Read, and Made, Whatcha Work-Up, A Little Bird Told Me, And Sew We Craft TogetherWe did it!, We Made that!, Two Girls and a Party
Thursday
Hooking up with HoHCatch a GlimpseCreative JuiceChic and CraftyThursday Favorite Things, Live Laugh LinkyCreative PrincessShare your Cup, , Linky PartyLink it UpMade you Look, Inspiration in ProgressBlog StalkingWildly OriginalShowcase your TalentSomewhat SimpleKeep Calm and Link UpFive Little ChefsCommercial BreakLamberts Lately
Friday
Show and Tell FridayFriday FavoritesSimply CreateLovely Crafty WeekendEBKTSWeekend WanderWeekend Show OffWeekend Bloggy ReadingFlaunt it Friday504 MainFriday FavsFancy This Friday, Flash Blog Friday, Finished FridayFreedom FridayShow off Friday, Happy HourKeep Calm and Link Up, Weekend Wonders, I'm loving it, Fiday FavsPity Party, Dare to Share, F Friday, Craftionary Link Party, Do Something Crafty, Get CraftyShine on Friday!
Weekend
Weekend Wrap UpSay G'daySaturday SpotlightStrut Your StuffCheck me Out Show and TellSaturday Spotlight,  Your Great IdeaSimply Sweet SaturdayShare it SaturdaySaturday Show and Tell,  No Rules Blog PartyCraft Create Inspire,  Sunday ScoopSunday ShowcaseThink PinkNifty Thrifty SundayNot Baaad SundayThat DIY Party,  Overflowing with Creativity PartyA Bouquet of TalentWeekend Creative

Monday

Monday, July 15, 2013

Mint Chocolate Chip Ice Cream

Guess what - July is national ice cream month!  What better way to celebrate than making (and eating!) homemade ice cream.  My dear husband loves ice cream (and pizza and cookies, lol)
Recipe adapted form Cuisinart

Ingredients:
  • 1 cup milk (the original recipe calls for whole milk.  1% or 2% will also work fine)
  • 3/4 cup sugar
  • 2 cups heavy cream
  • 1 teaspoon peppermint extract
  • 2/3 cup mini chocolate chips
Directions:
Use a whisk to combine the milk and sugar until the sugar is dissolved, about 1-2 minutes.  Stir in the heavy cream and mint extract.  Chill mixture in freezer for about 20 minutes (I find this helps the ice cream to firm up better)
Following ice cream machine instructions, mix ice cream mixture in freezer bowl for 20 minutes, or until thickened, (see picture below).  When the ice cream starts to come up over the paddles, it's nearly done :)

Add in the chocolate chips and green food coloring (if desired) and mix for 5 more minutes.
Serve immediately or store in the freezer.


Linking up here:
Monday
Tuesday
Anti-Procrastination Tuesday, Homemade TuesdayNifty Thrifty TuesdayTake a Look TuesdayToo Cute TuesdayOne Project at a TimeTasteful TuesdayTell me TuesdayTrick or Treat Tuesday,Tuesday Talent ShowTwo Cup TuesdayMemories by the MileTotally Tasteful TuesdaysTuesday ConfessionalTime for You Tuesday, Gathering Spot, Take it On Tuesday, You're Gonna Love it Tuesday, All my Bloggy FriendsTuesday to DoPin it TuesdayTasty Tuesday
Wednesday
Create and ShareSugar and SpiceWhat I Whipped UpWhatever Goes WednesdayShow me what ya GotLil LunaWow me Wesdnesday{Wow Me} WednesdayCast PartyRecipe RoundupYour Whims WednesdayWhat's Cooking WednesdayFluster's Creative MusterWednesday WhatsitShow and ShareDream to Reality, Wow Us Wednesday, What We Wore, Read, and Made, Whatcha Work-Up, A Little Bird Told Me,
Thursday
Friday
Weekend re-TreatFoodie FridayShow and Tell FridayFriday FavoritesSimply CreateLovely Crafty WeekendEBKTSWeekend WanderWeekend Show OffWeekend Bloggy ReadingFlaunt it Friday504 MainFriday FavsFancy This Friday, Flash Blog Friday, Finished FridayFreedom FridayShow off Friday, Happy HourKeep Calm and Link Up, Weekend Wonders,
Weekend
Weekend Wrap UpSay G'dayStrut Your StuffCheck me Out Show and TellSaturday SpotlightGreat IdeasYour Great IdeaSimply Sweet SaturdayShare it SaturdaySaturday Show and TellSunday ScoopSunday ShowcaseThink PinkNifty Thrifty SundayNot Baaad SundayScrumptious Sunday Recipe Link PartyThat DIY Party,Overflowing with Creativity PartyA Bouquet of TalentWill Cook for Smiles

Sunday, July 14, 2013

The 27th year

Yesterday was  my birthday, although it didn't really feel like it.  The last year has flown by... it seems like it was just last summer.  Looking back on this past year, from where I was a year ago, to where I am now - I have to say this has been one of the hardest periods of my life and the one filled with the most intense changes.  Holy Cow has a lot gone on in this past year!  Some of it good, some of it scary and hard, and some of it down right wonderful.

My 27th year in Review

July
I spent last years birthday celebrating with Matt and my cousins
Two days later, Matt and I went camping and biking with his family for three days
Near the end of the month, I celebrated my 2nd bridal shower - this time with Matt's family. 
Promptly after my shower, I returned to Rochester to work on packing (and no, this is not NEARLY all of my stuff... yet)  On July 30th, I moved to La Crescent.


August
I spent the first several weeks trying to unpack all of my stuff from the basement and straighten up Matt's house. 
I did, however, take a break to travel with my best friend R to New York City and see her get engaged!
Right after I returned from New York City, I turned around and traveled to the Cities to start the new school year.  This year, I changed positions.  I was no longer a teacher, but rather an advisor - like a counselor.  It was a tough transition as the advisory position was a new one, so there was lots of tweaking and figuring things out as we went.

September
Labor Day weekend saw me celebrating my third and final shower with my side of the family family and friends. 
The September was a blur of working long hours and frantically trying to pull everything together for our wedding.  Matt was working a lot of weekend hours, but he was being a really good sport helping me out a lot on his days off.

October
I got married!!!!  It was an awesome, amazing, wonderful day!


The hard work paid off!  Matt and I were married on a beautiful October day.  As everyone said, it all came together in the end, and the day went beautifully.  Our ceremony was beautiful and perfect and the reception was all we could ask for - we had a true party (complete with wedding crashers!) thanks to Matt's favorite band, Brat Pack Radio.

November
November seemed to stay busy as we settled into our house as a married couple and celebrated our first holiday as a married couple.  We continued our tradition of being lightbulbs in the Holidazzle parade on Thanksgiving weekend as well.  We also got a chance to celebrate Matt's birthday (he doesn't like big birthday celebrations, so we had a quiet dinner out, just the two of us)

December
December seemed to fly by as well, in preparation of the Holidays.  Matt and I did sneak in a visit to Rotary Lights to relive getting engaged.  :)  And saw the Canadian Pacific Holiday train when it stopped in our town.
We had our many Holiday celebrations with our families and tried to keep as many of our family traditions alive as we could. 

January
Matt worked... End of Story.  He worked a LOT - as in 90 plus hours a week.  It was insane.  He worked 21 straight days to start the month of January.  He would go to work at 9 in the morning and not return until midnight or two am.

February
We got a reward for all of Matt's work!  For one blissful week, right after Valentine's day, we got in some nice quality time when we were finally able to go on our honeymoon.  We went for a cruise in the Caribbean and it was so nice and relaxing and I loved the time with Matt and his undivided attention.  I hope that we can do something like it again sometime soon!


March
We thought winter was going to be over, but it seemed to stick around - basically snowing every Monday.  We made the best of things and went cross country skiing one weekend in March. 

April
April started off very nice, with a week off work for Spring Break.  I got to visit friends and took care of some appointments.  I traveled with Matt and his boss to his boss's hometown for his band's reunion, which was an interesting trip to say the least.
April, however, is no longer a nice month in my book, as it is also the scariest day of my life, when I had to call 911 and my husband was taken to the hospital.  Eventually he was diagnosed as having suffered a stroke and was released from the hospital five days later.

May
Thankfully Matt did not suffer physical limitations from his stroke, but he did have some memory problems and had a slow recovery, once we returned home.  May passed in a blur as I tried to catch up on being gone from school and attempted to close out the school year and complete my end of year work tasks.  Matt was home from work and had some follow up therapy appointments that also kept me busy.  I will be forever grateful for both of our families and my friends who supported us during this very difficult time, especially Matt's dad who would come each day to sit with Matt while I was working.

June
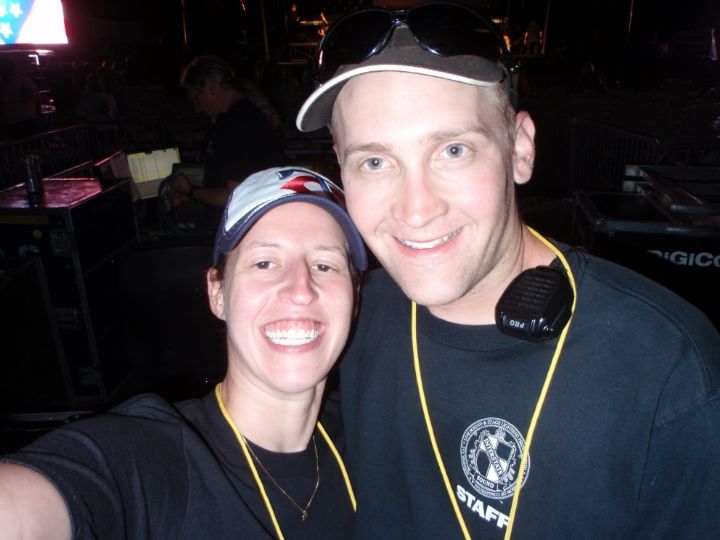
June saw Matt cleared to drive and return to work.  Very quickly he was back to a nearly unrestricted schedule.  He was able to help his company out at all of their big events in June (which means he worked every weekend in June).  So of course, my picture is of the two of us at an event.  On the plus side, the event was a Chicago and Daughtry concert and it was pretty awesome!
 photo 74f4d04e-8cfd-493a-b335-3d3b47cd4348_zps12f88bff.jpg
June also saw Matt and I make our 3rd annual camping trip to Whitewater state park - it's Matt's favorite park and he loves it.  I enjoy the time together, but this year the bugs and some rain got the better of me.  But for the most part we did have good weather and had fun hiking and exploring. 

July again
And here we are again - July.  We had a great time hosting our badminton tournament on the 4th of July and now we're back to my birthday.  Matt was working (of course) all day yesterday at the last St. Johns block party.  But I did have a good day (and make myself one awesome cake!)

So there you have it - my 27th year - sorry for such a long post!  But as you can see, a lot happened!  I moved, changed positions at work, got married, and went through a medical emergency concerning my husband.
While I may not have been ready to celebrate my birthday yesterday, I sure hope that next year is a little calmer and simpler and I can just slow down and enjoy life with my husband!

Wednesday, July 10, 2013

Cookout Organization


Sweet Summertime!  Love it!  Summer is a great time to relax with friends and family and cookout (or have a picnic).  But who wants to do tons of dishes after the company leaves - not I!  I know that using plastic silverware or paper plates is not very green, but it can be a huge stress relief for me to not have to worry about washing dishes both before and after and we can have more than 8 people over at a time (I only have a place setting for 8).  So when it comes to cookouts with friends, like our 4th of July cookout and badminton tournament I tend to use plastic.
My husband loves his badminton :)
But when it comes to a cookout, you can't just have napkins and forks and spoons flying everywhere.  And you already have plenty to carry - and in swoops this easy peasy cookout organizer to your rescue :)

Cookout Organizer
What you need:
Cardboard 6 pack carrier for glass bottles - you can use an adult beverage one, or Coke, or Spring Valley pop - even if you don't drink adult drinks, you can still make this!
Package of plastic knives, forks, and spoons
Napkins
Packing tape (if needed)
What to do:
Sort your silverware by type and put in each compartment along one side.


I wanted a space for napkins as well, so I bent back one of the dividers on the other side so I would have room for regular size napkins.  


If your silverware threatens to poke out the edges at the bottom, you can seal the sides with clear packing tape (or duck tape).  After carrying my organizer around for pictures and up and down to the basement for our cookout, it needed a bit of reinforcement along the sides - no big deal. 
You could also decorate this with tempera paint or stickers if you wanted to make it more family friendly.  
Have fun outside!


Organized 31

Linking up:
Wednesday
Create and ShareSugar and SpiceWhat I Whipped UpWhatever Goes WednesdayShow me what ya GotLil LunaWow me Wesdnesday{Wow Me} WednesdayCast PartyYour Whims WednesdayFluster's Creative MusterWednesday WhatsitShow and ShareDream to Reality, Wow Us Wednesday, Super Linky PartyWhat We Wore, Read, and Made, Whatcha Work-Up, A Little Bird Told Me, And Sew We Craft TogetherWe did it!, We Made that!, Two Girls and a Party
Thursday
Hooking up with HoHCatch a GlimpseCreative JuiceChic and CraftyThursday Favorite Things, Live Laugh LinkyCreative PrincessShare your Cup, , Linky PartyLink it UpMade you Look, Inspiration in ProgressBlog StalkingWildly OriginalShowcase your TalentSomewhat SimpleKeep Calm and Link UpFive Little ChefsCommercial BreakLamberts Lately
Friday
Show and Tell FridayFriday FavoritesSimply CreateLovely Crafty WeekendEBKTSWeekend WanderWeekend Show OffWeekend Bloggy ReadingFlaunt it Friday504 MainFriday FavsFancy This Friday, Flash Blog Friday, Finished FridayFreedom FridayShow off Friday, Happy HourI <3 Friday, Keep Calm and Link Up, Weekend Wonders, I'm loving it, Fiday FavsPity Party, Dare to Share, F Friday, Craftionary Link Party, Do Something Crafty, Get CraftyShine on Friday!
Weekend
Weekend Wrap UpSay G'daySaturday SpotlightStrut Your StuffCheck me Out Show and TellSaturday SpotlightGreat IdeasShow and Tell SaturdayYour Great IdeaSimply Sweet SaturdayShare it SaturdaySaturday Show and Tell,  No Rules Blog PartyCraft Create Inspire,  Sunday ScoopSunday ShowcaseThink PinkNifty Thrifty SundayNot Baaad SundayThat DIY Party,  Overflowing with Creativity PartyA Bouquet of TalentWeekend Creative

Monday