Showing posts with label organization. Show all posts

Monday, January 12, 2015

Organize that Tupperware!

Happy New Year Everyone!  I am so excited to be back to blogging :)  How are your new year's resolutions going?  Is one of them to be more organized?
With the turn of the year, many people use this time to a fresh start and try to get more organized in their life.  Last year I shared with you a binder I made to organize my homemade birthday cards.  This year, I am sharing with you how I organized my baking cabinet.  It also happens to be part of the Silhouette Challenge and I am so excited to take part in my first challenge.  (Can I just say I love my Silhouette Cameo?!  I really do - it's been awesome to learn to use is the last several months and there are so many amazing projects out there.  I can't wait to share more of the cute things I have made, but those are posts for another day :)
So clearly I love to bake - if you know me or have been reading long, you will find many yummy treats on here.  Every good baker needs to have her supplies easily accessible.  One of the things I loved about my husband's house when we first got married was the space for my baking supplies - It was a serious treat after having things stuffed in odd places in my tiny galley kitchen in my apartment.

While I love my baking cabinet, it definitely needed a bit of a face-lift and some organization.  This project fit the bill and was a super simple one to tackle.
The first thing I did was measure the face of each of the different sizes of Tupperware I wanted to label.

Next I picked a font I liked (I used KC Lemonade - so fun!)  (second side note - KC Lemonade came from dafont.com) and typed out my labels in the Studio program.  The KC font was pretty good, but to be on the safe side, I did offset the text by .02, just to make it a tiny bit thicker and easier to cut out.
I double check my measurements, to make sure that everything would fit, then it was time to cut!  I used Oracle 651 vinyl and used the default cut settings in Studio for vinyl.  I also used my mat when I was cutting.  
Once everything was cut out, it was time to weed it out (get rid of all the parts of vinyl you don't want, leaving just your letters)
I didn't have any transfer tape at the time, so I used a lint roller sheet instead.  Place your transfer tape over your design, and use your scraper tool to get it to stick to your letters.  Then slowly peel the backing away.  Now place your letters on your Tupperware and use the scraper tool again to get the vinyl to adhere to your Tupperware.  


Repeat as needed for each label you made. 
Ta Da!  All neatly labeled.  Now I not forever confusing my flour and sugar at first glace.  


I love how my cabinet looks now too - all pretty and organized.


Thanks for stopping by!


Want to Check Out More Silhouette Projects?

My Silhouette Challenge buddies and I are all sharing projects on our blogs today, so peruse the projects below for a wealth of Silhouette inspiration!
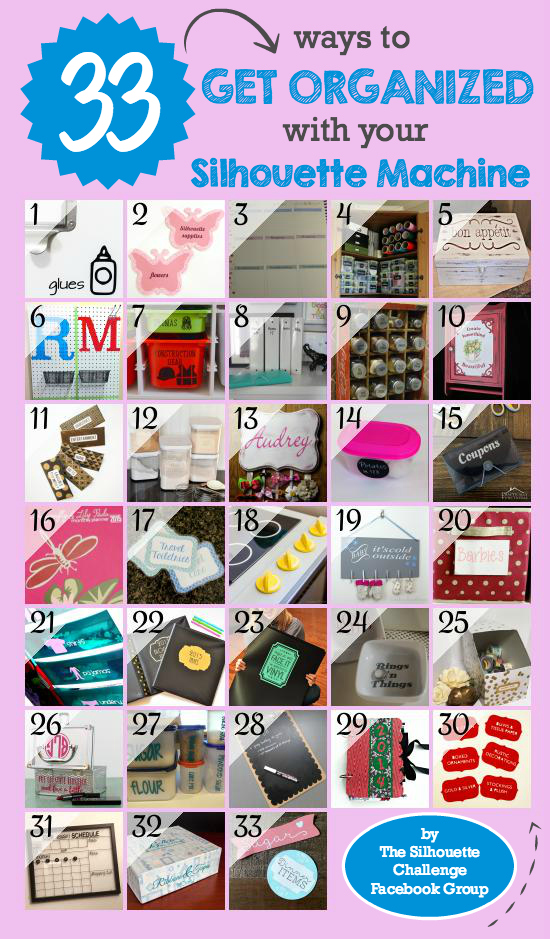
Organizing With Icons Butterfly Labels Customizing Your Erin Condren Life Planner Weekly Layout Organizing Your Craft Supplies with Labels Weekly Menu Box Peg Board Entry Way Order In Kid Land A Fun Way to Label Binders Sugar and Spice Looking Oh So Nice Turning a Plain Cabinet into Something Beautiful DIY Cash Budget Envelopes Flour and Sugar Pantry Container Labels Personalized Hair Bow Organizer Organize your Refrigerator DIY Vinyl Decorated Coupon Organizer 2015 Blog Planner Designed For Dragonfly & Lily Pads Laminated Labels with Your Silhouette The Secrets of How We Built Our DIY Play Kitchen Creative Way to Dry Winter Mittens Organizing Canvas Toy Bins with Labels Kids Closet Storage {with Rubbermaid Drawer Dresser and Vinyl Labels} Cute Gold Binder Labels {2015 Organization} Easy Vinyl Storage Organization and TWO Free Cut Files Personalized Ring Holders Upcycle for Organization Organizing Makeup with Style: A Monogrammed Makeup Case Vinyl Tupperware Labels How to Make a Chalkboard Clipboard Christmas Card Memory Book Simple DIY Holiday Storage Labels DIY Vinyl Frame Calendar with {FREE CUT FILE} Ribbons & Tapes Upcycled Organizing Box Print and Cut Pantry Labels
1. Please Excuse My Craftermath... // 2. Simply Kelly Designs // 3. Daily Dwelling // 4. Ginger Snap Crafts // 5. Our Southern Home // 6. Sowdering About // 7. The Moberg Family // 8. Decor Adventures // 9. Pineapples and Pinecones // 10. Patina Paradise // 11. The Thinking Closet // 12. It Happens in a Blink // 13. Adventures in All Things Food // 14. From Wine to Whine // 15. Practically Functional // 16. Dragonfly & Lily Pads // 17. unOriginal Mom // 18. One Dog Woof // 19. Creative Ramblings // 20. My Favorite Finds // 21. Create it. Go! // 22. A Prudent Life // 23. Where The Smiles Have Been // 24. Barb's Life // 25. Everyday Paper // 26. Pitter and Glink // 27. Peanut Life Adventures // 28. Feto Soap Blog // 29. Our Rosey Life // 30. Two Purple Couches // 31. My Paper Craze // 32. TitiCrafty // 33. Lil Mrs Tori

Wednesday, January 8, 2014

Birthday Card Organizer

Welcome to 2014!  I can't believe we're already into January.  I know many people have set organization goals for themselves for the year, and I wanted to share a quick tutorial with you to help you stay organized and make sure you don't forget any birthday's this year!
I've recently gotten into card-making (stay tuned for more posts on this!) and one thing I wanted to do was make handmade cards for all of my friends and family this year.  I like to plan ahead and put forth my best effort, and not be rushing to finish a card on the day I have to mail it.  So I decided to make a birthday card organizer so that when I have time, I can make my cards for the next few months and then they will be all organized and ready to go when they need to go in the mail!
What you Need:
  • Mini Binder (I got mine at Target)
  • Avery Mini binder folders (2 packets of 5) or Mini sheet protectors
  • 12 sheets of cardstock
  • Post it notes
  • Optional - cutting machine like Cricut or Silhouette

What to Do:
This project is really pretty simple.
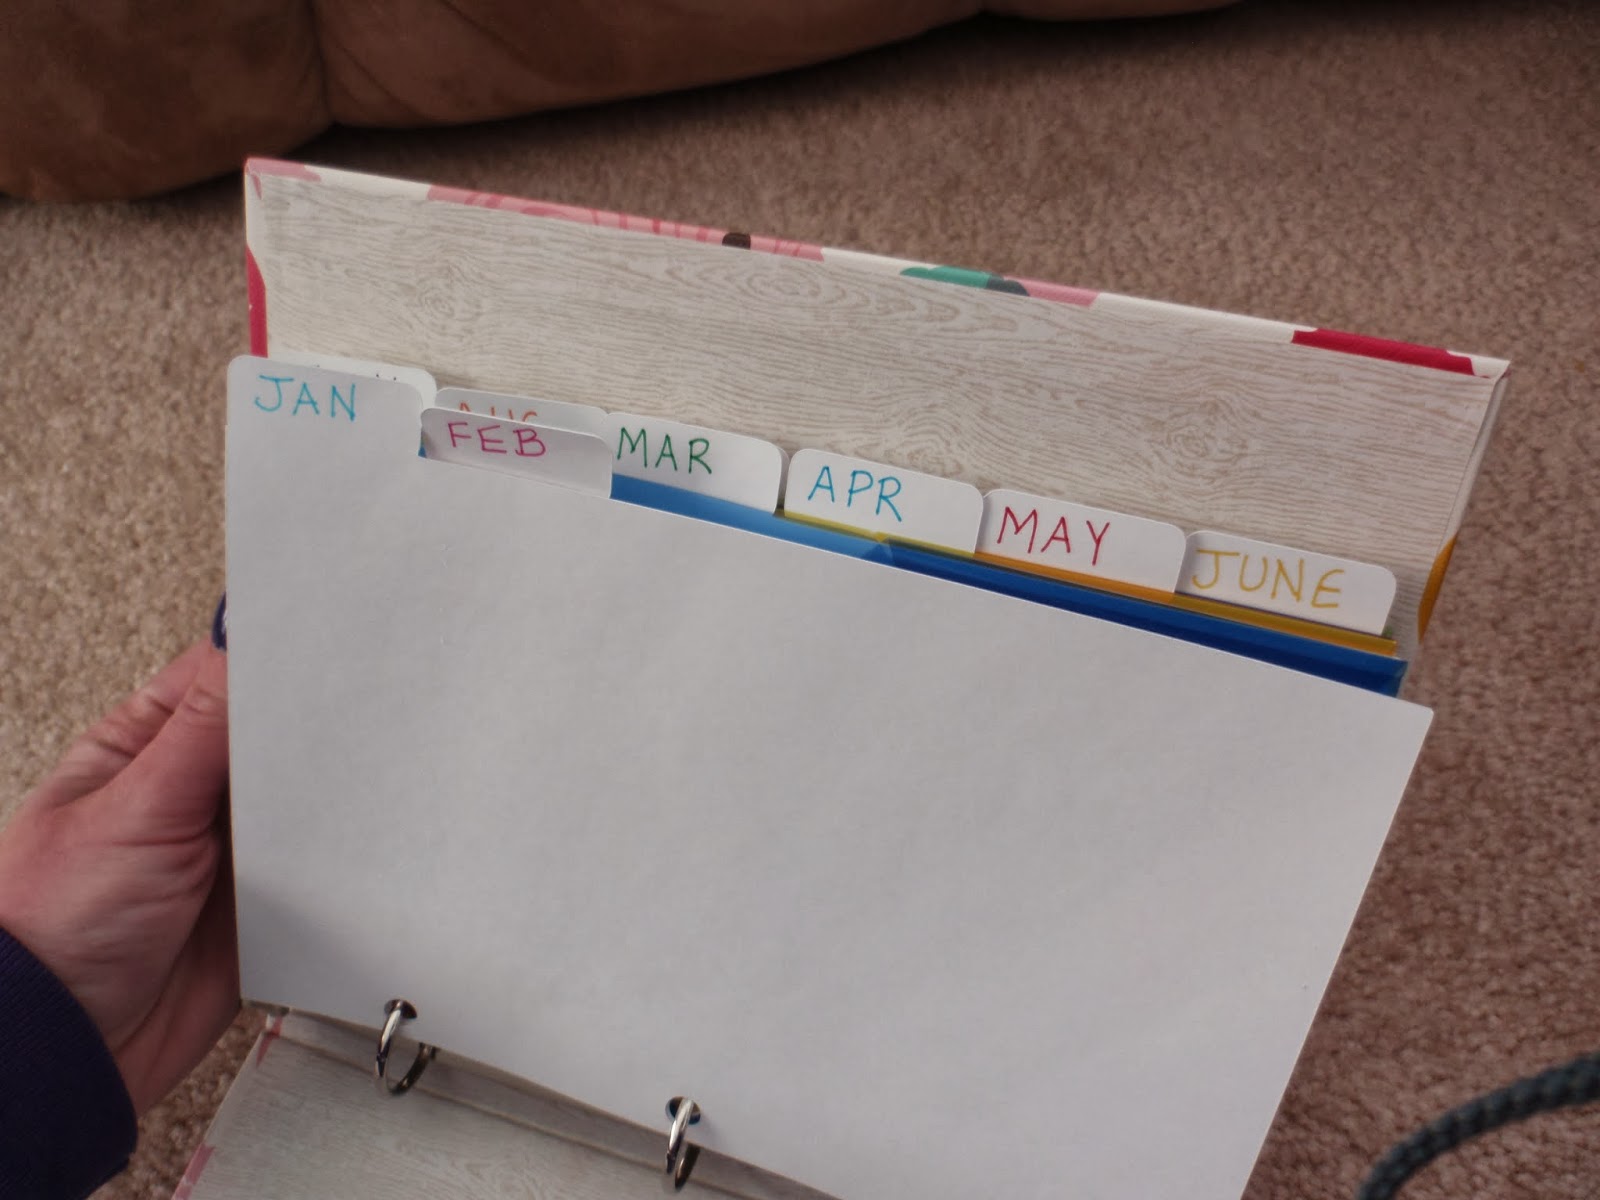
Using your cardstock, you are going to cut out tabs/dividers.  Hole punch and label them for each month.
You can either cut out the tabs and hole punch them by hand (just trace around them to create your own template).  Alternatively, you can use a Cricut or Silhouette to cut them out for you.  I got a Silhouette in their After Thanksgiving Sale and I love it!  This is my first big project with it and I'm so happy with how it turned out!  I designed my own set of six tabs for mini binders with three holes.
Use post it notes to write out holidays or birthdays for each month.
Place the Avery folders behind the tabs and there you go!  You can plan out your next few months of card giving and keep them all together so you are prepared when holidays or birthdays come up!  Place your cards in the folders and you'll be all ready and make sure to not forget a birthday! 
If cardmaking is not your thing, you can also create this and use it to store bought cards instead.
One thing to note, the folders only come in packs of five.  It works out fine for me, since I have two months where there are not birthdays, so it's fine for me.

If anyone can tell me how to save and share the silhouette cutting file or turn it into a free SVG file, I'd be happy to share the mini binder tabs I designed!
*Note, I think I can e-mail the Silhouette cutting file I made - e-mail me if you would like it!

Edit - Click here to get the download for mini binder tabs.

Good luck with getting organized for 2014!  Have a great week!

 Linking up:
Wednesday
Create and Share, Sugar and Spice, What I Whipped Up, Whatever Goes Wednesday, Show me what ya Got, Wow me Wednesday, {Wow Me} Wednesday, Cast Party, Your Whims Wednesday, Fluster's Creative Muster, Wednesday Whatsit, Show and Share, Dream to Reality, Wow Us Wednesday, A Little Bird Told Me, And Sew We Craft Together, We did it!, We Made that!, Two Girls and a Party
Thursday
Catch a Glimpse, Chic and Crafty, Thursday Favorite Things, Live Laugh Linky, Creative Princess, Share your Cup, , Blooming Linky Party, Link it Up, Made you Look,  Blog Stalking, Wildly Original, Showcase your Talent, Somewhat Simple, Keep Calm and Link Up, Five Little Chefs, Lamberts Lately, Inspire Us Thursday, Weekly Creative, All Things Pretty
Friday
Show and Tell Friday, Friday Favorites,Lovely Crafty Weekend, Weekend Wander, Weekend Bloggy Reading, Flaunt it Friday, 504 Main, Friday Favs, Fancy This Friday, Flash Blog Friday, Finished Friday, Freedom Friday, Show off Friday, Keep Calm and Link Up, Weekend Wonders, I'm loving it, Friday Favs, Pity Party, Dare to Share, F Friday, Craftionary Link Party, Do Something Crafty, Get Crafty, Shine on Friday!
Weekend
Weekend Wrap Up, Strut Your Stuff, Check me Out , Show and Tell, Saturday Spotlight, Your Great Idea, Share it Saturday, Sunday Showcase, Think Pink, Nifty Thrifty Sunday, Not Baaad Sunday, That DIY Party,  A Bouquet of Talent, Weekend Creative

Monday

Related Posts Plugin for WordPress, Blogger...