Showing posts with label cookies. Show all posts

Monday, November 3, 2014

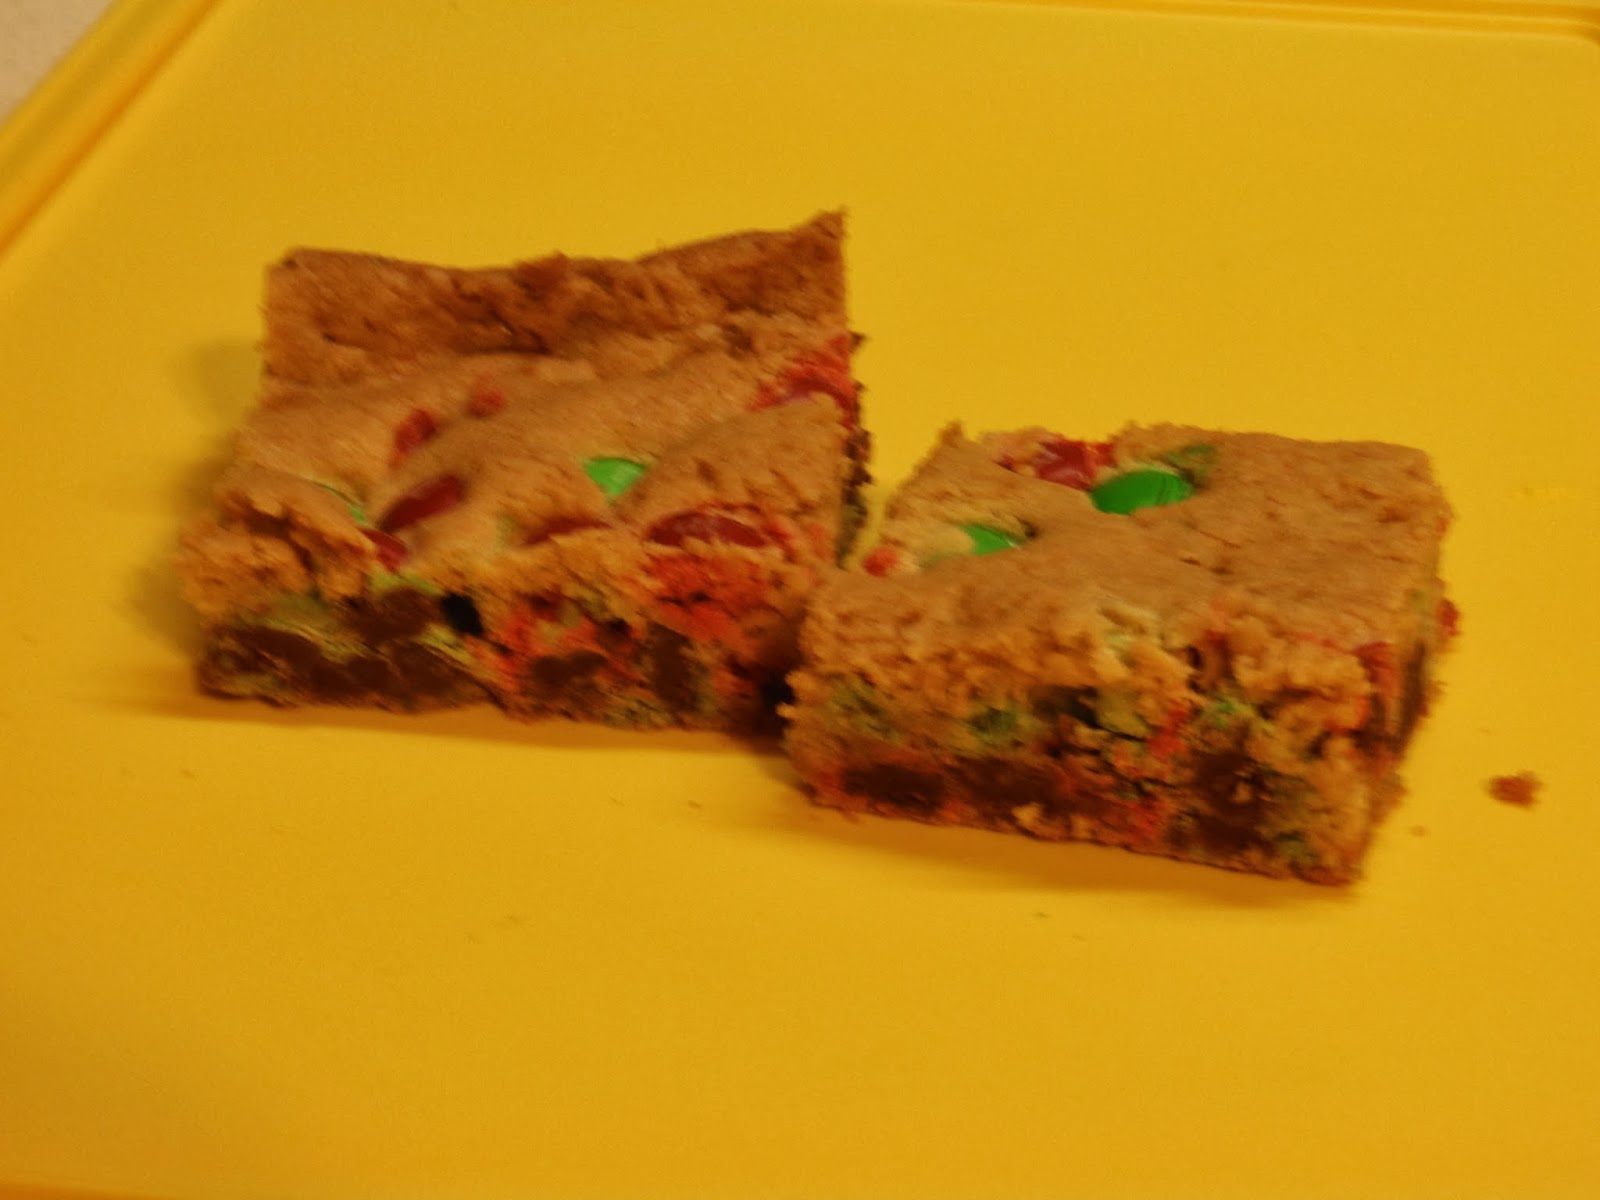
Loaded Cookie Bars

I hope you all had a great weekend (and fun celebrating Halloween if you do so).  Post Halloween there is usually lots of candy and treats lying around, so it's a great time to make these cookies.  The base dough stays the same, but you can basically chose your mix-ins, depending on what you have on hand, leftover, or whatever sounds good!  Oreos or graham crackers add a perfect crunch, and M&Ms, chocolate chips, or a variety of bit sized candy bars add some sweetness.  These cookies really leave it up to you!
These make up in no time at all and are great treat to share, or enjoy on your own with a tall glass of milk.  I took them to work with me and they lasted just minutes!

Loaded Cookie Bars
Recipe Adapted from Averi Cooks

Ingredients:
1/2 cup unsalted butter, melted
1 egg
1 cup brown sugar
1 TBSP vanilla
1 cup flour
2 cups/12 chopped Oreos (or grahman crackers, or pretzels, or other cookies)
1/2 cup M&Ms (or other candy/chocolate chips)

Directions:
To begin, preheat oven to 350 degrees.  Then prep an 8x8 pan with foil and spay with cooking spray.
Begin making the cookies by melting the butter.  Let cool slightly, then add egg.  Mix in brown sugar and vanilla and mix until smoother.  Next, add the flour and stir until just combined, being careful to not overmix.  Then it is time to fold in your add ons.  I used Oreos and M&Ms but you can use whatever you want!  I mixed in half of my M&Ms and held back the other half.
Place batter into pan and smooth or pat out as best you can (dough will be very very sticky).  Then sprinkle remaining M&Ms or candy on top of the batter. 
Bake for 20 to 22 minutes.  Top should not look doughy and the edges should be just barely browning.  If you can, use a toothpick to test the center.
Make sure to let the bars cool in the pan for at least a half hour before slicing.  Store in an airtight container. 
Enjoy!


Linking up at some of these great parties!


Monday, October 13, 2014

Spiced oatmeal cookies


Happy October!  The weather has definitely turned to fall around here.  Two weeks ago it was 80 degrees, this past weekend it was blustery and highs in the 40 (With some snow mixing in the rain overnight - so not ready for that!).  Fall sure did arrive with a vengeance as the calendar turned to October.  
With the cooler weather, I am definitely thinking about fall baking.  I am not really a fan of pumpkin, so you won't see tons of pumpkin spice recipes on here.  While I'm not a fan of the pumpkin flavor, spices like nutmeg and cinnamon and cloves always have a warm feeling to me and work perfectly for fall.  Enter these oatmeal spice cookies!  They are delicious and go great with a warm cup of coffee on a chilly fall morning.  
If it has oatmeal it's healthy, right? That's what my neighbor asked when I dropped off a few of these cookies to her. I told her they were healthy enough, but they sure we're delicious and I had had to hide a few for her before my husband and I devoured them all! They are very addicting and have a great taste. The light glaze adds just a hint of sweetness and I love how nice and chewy they are (due to the oatmeal)

Spiced Oatmeal Cookies
Recipe Adapted from Annie's Eats

Ingredients:
For the dough
  • 1 cup old fashioned oatmeal
  • 1 cup flour
  • 1 1/2 tsp baking powder
  • 1/4 tsp baking soda
  • 1/4 tsp salt
  • 1/2 tsp cinnamon
  • 1/4 tsp nutmeg
  • 8 TBSP butter (1 stick)
  • 1/2 cup brown sugar
  • 1/4 cup sugar
  • 1 egg
  • 1 tsp vanilla
For the icing
  • 1 1/2 cups powdered sugar
  • 2 TBSP milk
  • 1/2 tsp vanilla
Directions:
Using a stand mixer, combing butter and sugars until light and fluffy.  Add in egg and vanilla.  Slowly add the oatmeal, flour, baking powder, baking soda, salt, cinnamon, and nutmeg.  Blend well.  Using a cookie scoop, place on baking sheets covered with a silicone baking mat (or parchment paper, or grease cookie sheets). 
Bake for 10 minutes at 350 degree.  Let cool for a few minutes on baking sheet, then transfer to a wire rack to finish cooling.
When cookies are completely cooled, make your icing.
Combine powdered sugar, milk, and vanilla and wish until smooth.  Add more sugar if thicker icing is desired, more milk to make it more runny.  Carefully dip the top side of the cookie in the icing, hold cookie over icing bowl for a few seconds to let excess icing drain off.  Let icing set before storing cookies. 
Enjoy!
 

<--- click the magic button for nutrition info and a printer friendly version!


Linking up at some of these great parties!


Monday, August 18, 2014

Smore Bars

Ahhh Summertime, how quickly it goes!  A few blinks and my short time off from work goes by in an instant.  We have had a ton of fun this summer, but it's back to work I go.  As you read this, I will be sitting in my in-service meetings.  While I enjoy the fresh start and the excitement of a new school year, I'm not sure I'm ready to transition back to the grind of working everyday.  I sure do love my summers!


This sweet treat today is a great one to bring back memories of summer - camping, hiking, bonfires, and of course, s'mores!  I was lucky enough to be able to go camping three times with my husband this summer (and with both sets of our parents as well, one time each, and one time with my friends).  Of course, every time we go camping, we make s'mores!
I have a coworker who has a major sweet tooth, and I love making treats to bring with me when I have to travel to the office every month.  For a long time, he has been requesting a Hershey cookie with graham crackers.  I hadn't heard of such a thing, but of course, was able to find something on Pinterest!  I made these s'more bars to celebrate the end of summer (or if you happen to read this in the middle of winter, it can be a sweet reminder of summer!).  

S'more Bars
Recipe Adapted from: I Heart Naptime

Ingredients:
  • Crust:
    • 1/2 cup melted butter
    • 1 1/2 cup graham cracker crumbs
  • Dough
    • 2 cups brown sugar
    • 2/3 cup butter
    • 2 eggs
    • 2 1/2 cup flour
    • 2 1/4 tsp baking powder
    • 1/2 tsp salt
    • 1 tsp vanilla
    • 1 cup chocolate chips
    • 1 cup mini marshmallows
  • Topping
    • 1 Hershey bar - break each little bar into pieces
    • 1 Graham cracker - break into pieces
    • 1/2 cup mini marshmallows


Directions:
Heat the oven to 325 degrees. 
Make the crust by combining the melted butter and graham cracker crumbs in a small bowl using a fork.  You will need about 8 crackers (full sheets) to create the crust.  Once the crust has been made, line a 9x13 pan with foil and press the crust into the pan.  
Next cream the butter and sugar together, then add in eggs and vanilla and mix until combined.  Add in the baking powder and salt, then mix in the flour.  Finally, fold in the chocolate chips.
Once the dough is made, flour your hands and press the dough on top of the crust and flatten it out.
Then add the topping of graham cracker pieces, broken chocolate, and left over mini marshmallows. 
Bake for 30-35 minutes.  Test middle with a tooth pick.  Dough will be soft, but toothpick should come out clean. 
Allow bars to cool completely before cutting.  Then enjoy with ice cream or a tall glass of milk!


<--- click the magic button for nutrition info and a printer friendly version!


Linking up at some of these great parties!

Monday, July 28, 2014

Bachelorette Cookies - Royal Icing

My "little" brother is getting married at the end of the week.  I can't believe it!!!  While he is certainly not little anymore (in fact, he' been taller than me since high school), it's still a little weird for him to be getting married.  Despite that fact that he's getting married makes me feel incredibly old, I am over the moon happy for him and his bride to be.  There's been a lot of celebrating going on recently, and of course, I've been baking and crafting to celebrate the occasion, because that's what I do :)

I hosted a shower for my sister-in-law-to be, and I'll share details on that soon, but first I couldn't wait to share these bachelorette party cookies.  Can you say cute and fun?  Even better - they are Delicious - with a capital D.  Love love Love these cookies.  


I had been wanting to try royal icing for a long time, but had been a little (or a lot) intimidated by it.  This occasion gave me the push I needed (with a little inspiration from Pinterest!)
After giving the Royal Icing a try, I have to say that it is definitely not as scary as I thought, however, it IS time consuming.  So not something I want to do all the time, but for an added "WOW!" factor, it's certainly possible.  Royal icing gives you a lot more detail when frosting cookies, so f you are looking for something fancier, definitely give it a try.  If it's your first time doing royal icing, I recommend attempting now more than 2-3 colors - it will make your life much easier, I promise! 
Just a note - the meringue powder for the icing can be found at either a craft store (like Hobby Lobby or Michael s, in their baking isle) or at the grocery store.


Royal Icing Bachelorette Cookies
Ingredients:

  • 4 cups powdered sugar
  • 2 TBSP meringue powder
  • 5 TBSP water (plus more later for thinning)


Since this is a bit of a special recipe, there are also some tools you will need.  

  • Sugar cookies (make sure they are completely cooled!)
  • Gel Icing colors (I use Wilton brand)
  • Small containers with lids for each color of icing you want to use
  • Spoons
  • Toothpicks
  • Pastry bags with small round tips (I use size 2 or 3 for flooding, and smaller/other sizes for designs and decorating)
  • Squeeze bottles

Instructions:
First things first, you'll need to make your icing.  Combine the powdered sugar, meringue power, and water in a stand mixer with the paddle attachment.  Mix on low until well blended, then keep mixing!  You will want to mix for about 5 minutes until the icing has a matte appearance (it should not be shiny at all).  Now you will need to add a tiny amount of water - start with 1/2 teaspoons, until it becomes piping consistency.  Piping consistency is when you pick some icing up with a spoon and let it run back into the bowl, it should take about 5 seconds for the icing to be reabsorbed into the rest of the icing.  You can also test out a small amount in your pastry bag as well.  Try not to let your icing get too runny at this point (although if it does get too runny, you can add more powdered sugar to stiffen it up)
*Hint - while you are working with royal icing, make sure to keep any icing you are using covered in a container so that it does not harden on you!  Any pastry bags you are not using (but have incing in them) should be stood up in a glass with a bit of water in the bottom so that the icing in the tip does not harden)*
Ok, so now you have piping icing.  The next step is to tint your icing the color you want to outline your cookies.  Once your icing is colored, you are going to pipe a border around the edge of each cookie.  Let the icing set and harden.  
Next step will be flooding your cookies.  Once your border has hardened, you are going to thin out some more icing.  Take some of your icing in a separate bowl, and add a tiny bit more water.  Now you want the icing to flow off a spoon and disappear in 2-3 seconds back into the bowl of icing.  Let the icing stand about 5 minutes to let any bubble come to the surface, then give the icing one more gentle stir to pop the bubbles (this will save you time later).  Once icing is thinned out, use your squeeze bottles to "flood" your cookie with your main color of icing.  *Hint, you can use a toothpick to help drag the icing to the corners of your cookie if need.  Toothpicks also work great to pop any air bubbles that appear on your cookie.  
Before moving on the the next step, let you cookies dry and harden really well.  You can even leave them out overnight, if needed, to make sure the icing is completely dry.  depending on the weather or the temperature of your kitchen, your cookies could be dry in an hour, but wait longer if you are unsure.  The royal icing helps seal in the moisture of the cookie, so depending what type of sugar cookie you use, you shouldn't have to worry about them drying out. 
Finally, once your main color is done, you are ready to decorate with your piping icing again.  Let dry for at least an hour before packaging or storing.  I do not recommend freezing cookies that have been decorated with royal icing as the icing with gather condensation in the freezer and look funny. 
Congratulations!  You did it!  You decorated with Royal Icing!

To make lingerie cookies, I used a heart cookie cutter - who knew?!


<--- click the magic button for nutrition info and a printer friendly version!


Linking up at some of these great parties!


Truly Lovely

Monday, June 30, 2014

Painted Star Cookies

Happy 4th of July week!  I can't believe June has come and gone already.  Why does summer go by way to fast?  I'm excited to be sharing this post and participating in Raise.com's 4th of July Celebration! (PS - Raise.com has an exchange program to buy and sell gift cards, if you haven't already checked it out, I encourage you to do so!)  But back to this delicious (and easy!) recipe!
I love celebrating the 4th of July!  Even though my husband has to work, we still make it a good day.  We always have our friends over for a badminton tournament in-between my husband's morning set up, and having to go back to work for the concert.  We love to play badminton with our friends and we always have lots of good things to eat and grill and have our own early cookout.  Of course, I have to make dessert :)  Usually I make a cake, but sometimes cookies are good for sweet treats on the go!

I found these cookies when I was searching for a recipe to use an egg yolk.  (Let me tell you, it was a long search!).  When I make sugar cookie bars, they need one egg and one egg white.  What to do with the leftover yolk?  I have been on the hunt for recipes that use just one egg  yolk.  This is one that I came across that I think I will be making a lot more in the future - super duper easy and gives the impression of frosted cookies without all the work!
What do you do with your family to celebrate the 4th of July?

Painted Star Cookies
Recipe Adapted from Gwenny Penny

Ingredients:
  • 3/4 cup Crisco/shortening
  • 1 cup sugar
  • 2 eggs
  • 1 tsp vanilla
  • 2½ cups flour
  • 1 tsp baking powder
  • 1 tsp salt
  • 1 egg yolk
Directions:
To begin, cream together the shortening, sugar, eggs, and vanilla.  Slowly blend in the flour, baking powder, and salt.  Chill dough for at least an hour.
Once dough has chilled, roll out on a floured surface and cut with cookie cutters.  Aim for about 1/4 inch thick.  Place cookies on ungreased baking sheet (or baking sheets covered with silicone mats - I love 'em!).


 Now for the fun part - decorating!  Do this before baking!  Mix one egg yolk with 1/4 tsp water.  Separate the mixture into small bowls and color with food coloring - I used gel food coloring for a richer color. Once you have reached your desired color, take a paintbrush and paint the egg yolk onto the unbaked cookies.  I just used paintbrushes from the kids section at the craft store that I got for a dollar. 


Once decorated, bake at 400 degrees for six minutes.  Don't over bake!  And bam!  You have decorated cookies, that you don't have to frost after baking - love simple recipes like this!


Happy 4th of July!


<-- Click for nutritional info and a printer friendly version

Linking up at some of these great parties!


Monday, May 26, 2014

Frosted Sour Cream Cookies

Happy last week of May!  I can't believe we're almost to the end of the school year (but I'm so ready for it!).  The last few weeks, I've brought you some quick and easy chicken dinner recipes, but today, I wanted share another awesome cookies recipe.  Because if you know me at all, you know I don't usually go more than a week or two without making cookies.  These, I think, are going to be regular requests (at least by me!  I love frosted sugar cookies!).  I ran into them one day when I was searching Pinterest and MyRecipeMagic  looking for some new cookie recipes.  I wanted to try some cookies with sour cream because I had some to use up, also, I had made some cookies previously with sour cream and it added a wonderful texture to the cookies and wanted to try some other recipes with sour cream. I hope you enjoy these and have a great week!

Sour Cream Cookies
Adapted from Kristy Shellhorn

 Ingredients:

  • 1/2 cup butter
  • 1 cup sugar
  • 1 egg
  • 1/2 coup sour cream
  • 1 tsp vanilla
  • 3 1/2 cups flour
  • 1 tsp baking soda
  • 1/2 tsp salt
For the Frosting

  • 3 cups powdered sugar
  • 3 Tablespoons butter (softened)
  • 3 Tablespoons milk
  • 1 1/2 teaspoon vanilla extract

Directions:
In the bowl of a stand mixer, cream the butter and sugar together and then mix in the egg, sour cream, and vanilla.  Add in the dry ingredients.  Chill for at least an hour.
After dough has chilled, preheat oven to 375 degrees.  Then  flour your workspace and roll out cookie dough (suggested thickness is 1/8 inch), then cut out.  Place cut dough on cookie sheets lined with silicone baking mats.  Bake for 8 - 10 minutes.  
Make sure that cookies have cooled completely before frosting.  (I really love this frosting!  It's easy to make and doesn't just taste like powdered sugar!)


<--- click the magic button for nutrition info and a printer friendly version!
Linking up at some of these great parties!

Monday, March 10, 2014

Chewy Sugar Cookies

Ahhh March!  So happy you have arrived (and finally brought some warmer weather!)  So glad that spring is on the way?  Did you enjoy the month of letter's post during February?  I hope so!  I know I missed some posts here and there, but I did successfully mail at least one letter each day in February - I was pretty impressed with myself and happy to have me my goal!  Now we are back to our regularly scheduled Peanut Life Adventures posts.  Time for a new recipe on Monday!  Let's start the week off right!

No doubt about it, I love sugar cookies.  Add a little bit of frosting and you have my perfect cookie.  Sugar cookies have always been my favorite.  I like a nice soft sugar cookie - just barely cooked.  I don't like thin and crispy cookies, but rather a chewy cookie that melts in your mouth.  I'm still on the hunt for the "perfect" cookie (and frosting), so if you have any suggestions, send them my way!
In my hunt for my definition of the perfect cookie, I stumbled upon these chewy sugar cookies with a light frosting glaze - definitely worth a try!  And they didn't disappoint!  They were delicious and lived up to their name - nice soft and chewy!
Chewy Sugar Cookies
Recipe adapted from Lil'Luna
Ingredients:
  • 3/4 cup sugar
  • 1/2 cup softened butter
  • 2 TBSP shortening (I used Crisco)
  • 1/4 tsp salt
  • 1 egg
  • 1 TBSP light corn syrup
  • 1 1/2 tsp vanilla
  • 2 cups flour
  • 1 tsp baking powder
  • 1/2 tsp baking soda
Directions:
Using a stand mixer, cream the butter, sugar, shortening, and salt together.  Add in the egg, corn syrup, and vanilla and beat well.  Add in the dry ingredients.  Using a cookie scoop, drop balls of dough onto a cookie sheet covered with parchment paper or silicone baking mat.  Bake for 11 - 13 minutes.  Remove and let cool on a wire rack.  While cookies are cooling, mix the frosting.  
For the frosting, mix 1 cup powdered sugar, 1/2 teaspoon vanilla, and 1 1/2 Tablespoons of milk (more or less depending on what consistency you want).  Tint with food coloring if desired.  Drizzle frosting over slightly warm cookies, add sprinkles if desired. 
Enjoy!


<--- Click for a printer friendly version and nutrition info!

Linking up at some of these great parties!

    Monday, February 17, 2014

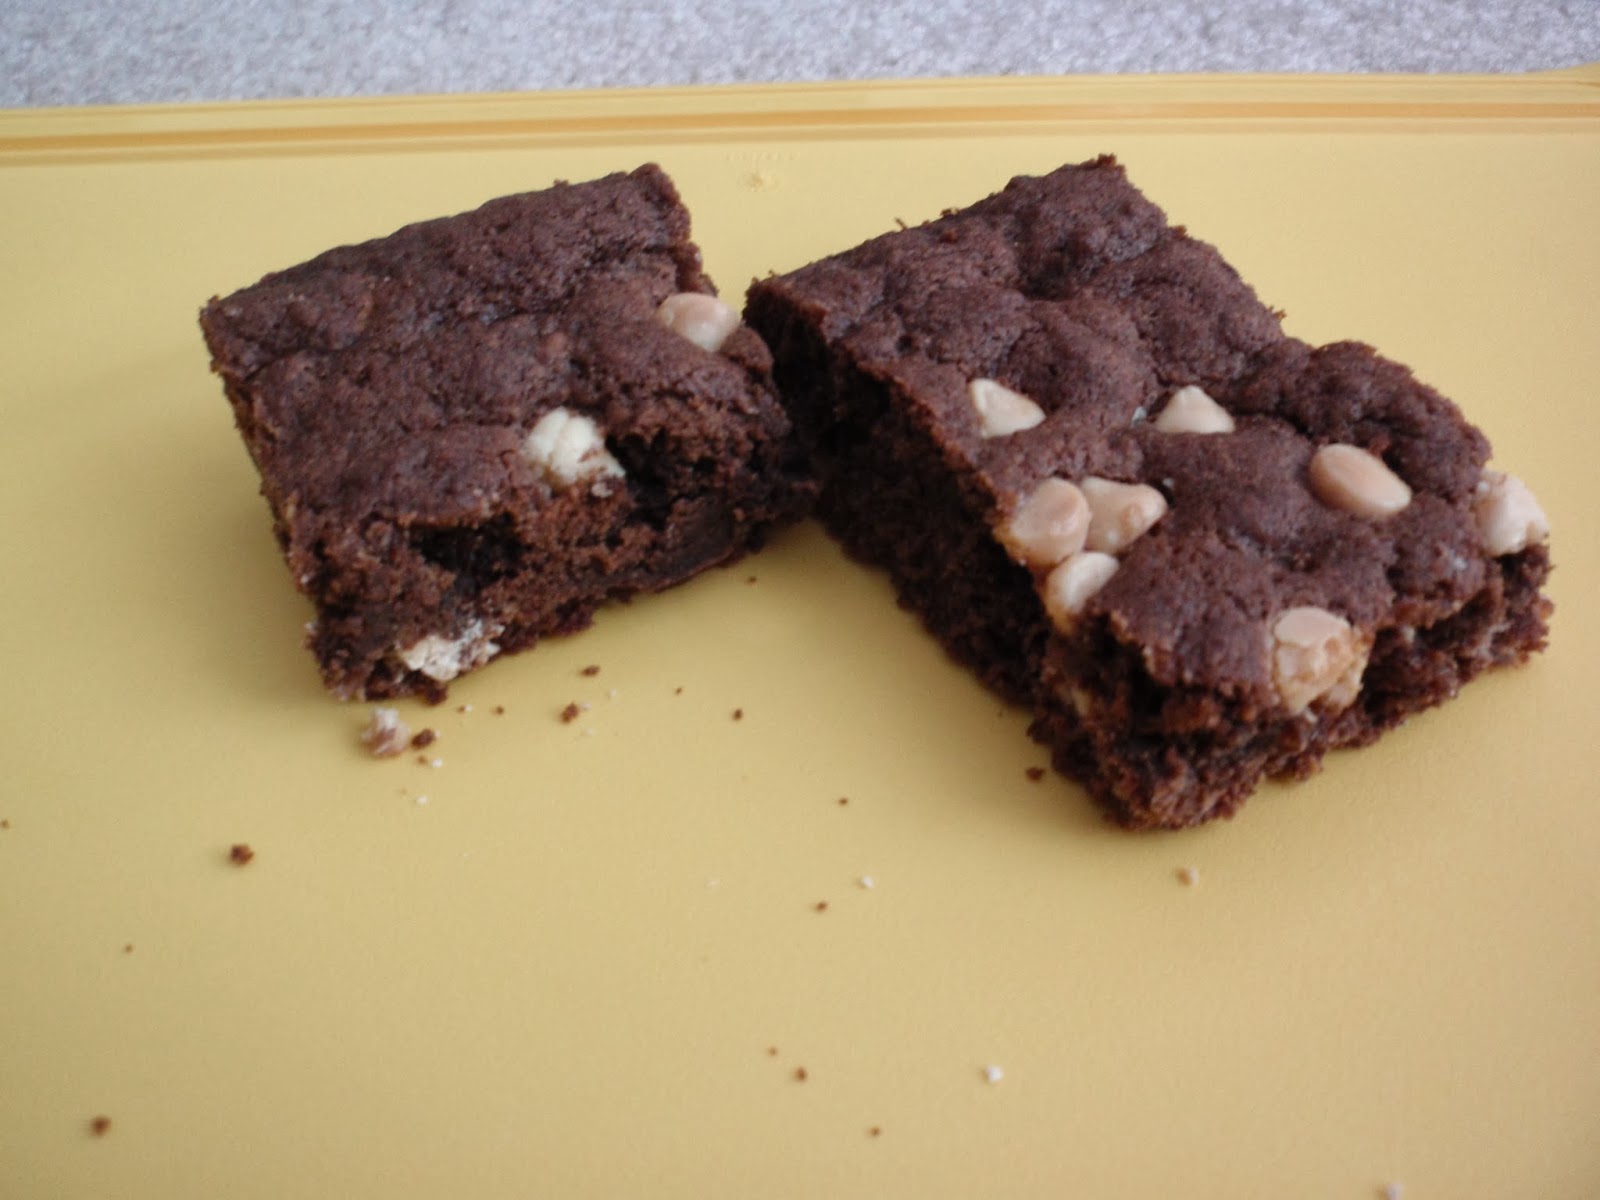
    Polka Dot Cookie Bars

    Hello!  Welcome back to PeanutLifeAdventures.  Remember last month when I shared these M&M Cookie bars?  If you liked those, you should love today's sweet treat.  It came, from all places, from a magazine clipping from my mother-in-law.  My mother-in-law is an extremely healthy person.  She eats very healthy, balanced meals, and I hardly ever see her take a bite of dessert.  When she gave me this recipe, I was pretty surprised, but she knows her son/my husband loves his treats and knows that I like to bake for him.  These polka dot cookie bars certainly earned my husband's approval!
    Again, I love the easy and simplicity of cookie bars.  I like that they just bake in one pan, and no rolling out dough, and a lot less cleanup.  Win in my book, especially when I am pressed for time, but still want to have a treat to enjoy for the week.
    Polka Dot Cookie Bars
    Recipe adapted from Taste of Home
    Ingredients:
    • 1 cup butter softened
    • 3/4 cup sugar
    • 3/4 cup brown sugar
    • 2 eggs
    • 1/2 teaspoon vanilla extract
    • 2 1/4 cups flour
    • 1/3 cup baking cocoa
    • 1/2 teaspoon salt
    • 1 1/2 cups white chocolate chips (divided)

    Directions:
    In the bowl of a stand mixer (or a regular bowl if you don't have a stand mixer), cream the butter and sugars together until smooth.  Add eggs and vanilla extract and beat well.  Slowly add in the flour, cocoa, baking soda, and salt.  Fold in 1 cup of white chocolate chips.  Spread in a well greased 15x10x1 inch pan.  Sprinkle the remaining white chips over the top of the batter.
    Bake at 375 degrees for 18-23 minutes.  
    If you don't have a 15x10 pan, you can use a 9x13 pan to make the cookies instead.  They will be thicker and will need longer to cook (closer to 30-40 minutes).  Test with toothpick near the center, if it comes out clean, then they are ready (be sure to do this step with cookie bars - it's important so you don't have doughy/soggy cookie bars in the middle!)
    Let the cookie bars cool in the pan before cutting.
    Enjoy!

     <-- Click for nutritional info and a printer friendly version

    Linking up at some of these great parties!

    Monday, February 10, 2014

    Olympic Cookies

    I love love LOVE the Olympics!  I am so excited to be watching them for the next few weeks.  One of the things I on my bucket list has always been to see the Olympics live.  I tried very hard to get tickets to the London Olympics because that would have crossed two items off my bucket list in one go, but it didn't happen as all the tickets sold out, even via the lottery system.
    Every two years, when the Olympics are on, I glue myself to the TV, watching way more than I should, to catch every second of Olympic Glory that I can.  And this year has been no different.
    To kick of the Olympics, I was planning to watch the opening ceremonies with some friends.  I love the pageantry and history showcased in the opening ceremonies - this history/geography girl is in her element :)
    I made these cookies to have as a treat during the opening ceremonies, and while my friends weren't able to make it, my husband and I sure have been enjoying them!

    Olympic Cookies
    Recipe adapted from LoveToBeInTheKitchen

    Ingredients:
    • 1 cup unsalted butter (softened)
    • 1 cup Sugar
    • 1 egg
    • 1 Tablespoon milk
    • 1 teaspoon vanilla extract
    • 3 cups flour
    • 3/4 teaspoon baking powder
    • 1/4 teaspoon salt
    For the Frosting
    • 3 cups powdered sugar
    • 3 Tablespoons butter (softened)
    • 3 Tablespoons milk
    • 1 1/2 teaspoon vanilla extract
    • M&Ms


    Directions:
    Cream the butter and sugar together until light and fluffy.  Add in the egg, milk and vanilla and mix well.  Slowly add in the baking powder, salt, and flour.  Mix until well combined and you have a big clump of dough.  Divide the dough in half, flatten into rectangles, and wrap in waxed paper and refrigerate for at least two hours (or overnight).
    Roll out dough on floured work surface. (I thought this dough was a bit beastly to roll out, because it was SO stiff!  I found it helped to let the dough warm up for a few minutes before trying to roll it out.  It also helped to work it in my hands some to make it more pliable.)  Roll to 1/4 in thick and then cut with a round cookie cutter.  Place cookies 1 inch apart on silicone baking mat on cookie sheet.  Bake at 375 degree for 7-9 minutes until the bottoms of the cookies are just slightly brown.  Let cool for a few minutes on the cookie sheet before moving to cooling rack to finish cooling.
    Once cookies are cooled completing, frost using a knife.   (Side note - I really LOVE this frosting!  It's the perfect combination and doesn't taste just like powdered sugar!) Place the M&Ms on the cookies (with the Ms facing down), to form the Olympic rings.  On the top row, place a blue, brown and red M&M and on the bottom a yellow and green.

    Enjoy!  What's your favorite Olympic event?

    <--- Click on the magic button for nutrition info and a printer friendly version!


    Linking up at These Great Parties 


    Monday, January 27, 2014

    M&M Cookie Bars

    I know I know, we are still in January and most people are still working super hard on their New Year's resolutions to eat healthy.  I fully support that.  But I can't resist making some delicious desserts.  My husband certainly doesn't complain!  I don't know where he puts all the cookies and sweet treats he eats, but he's as skinny as ever.  He's always happy to be my taste-tester anytime I ask.

    A the beginning of the month, we traveled to Madison to visit some close friends.  I was crazy busy with returning to work after the holidays, but I still wanted to make something to take with us to share.  I had some leftover holiday M&Ms and found this recipe on Pinterest.
    
     
    Enter these M&M Cookie Bars.  The thing I love about cookie bars is they are quick and easy to make!  No rolling out dough, no cleaning up multiple cookie sheets/silicone mats/cooling racks.  One bowl to mix in and one pan to bake in and your done.

    M&M Cookie bars
    Recipe Adapted from I <3 Naptime

    Ingredients:
    • 12 Tablespoons (1 1/2 sticks) butter
    • 3/4 cup sugar
    • 3/4 cup brown sugar
    • 2 eggs
    • 1 teaspoon vanilla
    • 2 cups flour
    • 1/2 teaspoon baking soda
    • 1/2 teaspoon baking powder
    • 2 cups M&Ms divided
    Directions:
    In the bowl of a stand mixer (or any mixing bowl), cream the butter, sugar, brown sugar, eggs, and vanilla.  Mix for at least 1 minute.  Add in the baking soda, baking powder, and slowing incorporate the flour.  Mix in  1 1/4 cups of M&Ms.

    
    You can bake these two ways.  The original directions call for baking on a 9x13 pan lined with foil.  That is what I did the first time I made these.  I think it would be easier to use a glass pan, sprayed with cooking spray, and forgo the foil.  Your choice - use whatever sounds easiest to you!
    Spread out the mixture in the pan as best you can.  It will be very sticky.  It's ok if it is not level and not in all corners of the pan as it will spread out as it bakes.
    Sprinkle the remaining M&Ms over the top

    Bake at 325 degrees for 25-35 minutes.  Or until a toothpick comes clean (this took nearly 40 minutes for me - make sure you check this!  I know it's easy to want to skip this step, but you want to make sure all of your bars are cooked through!)

    Let cool for five minutes then slice while still slightly warm (it makes slicing a whole lot easier!)
    Eat fresh or store in an airtight container.

    Enjoy! 
     

    <-- Click here for nutritional information and a printer friendly version!


    Monday, December 23, 2013

    Top 5 Traditional Christmas Cookies


    I love love love to bake at Christmas time.  I always have a set of traditional recipes that I make.  It just doesn't seem like Christmas can arrive until I have baked these items.  :)  Even when I was in college I would always have a baking marathon as soon as I got home after finals so that I could make these traditional cookies for my family.
    Without further ado, here are my top five Christmas recipes

    1. Traditional Cutout Cookies
     These cookies entered my family in the 1960s when my aunt started baking (that's what the recipe card says :).  My mom and I have been making these for as long as I can remember, I think I took over sole "rolling out" duties when I was 8 or 10.  It's a huge batch, but they always disappear fast!

    2. Candy Cane Cookies
    I love the "twist" on these cookies.  They also have a great taste.

    3. Christmas Tree Cookies
    These are cookies my mom made with her mom and the old aluminum crank cookie press.  I never met my grandma, but I like making these in honor of her each year.  Plus, these ones freeze great, my mom likes them best straight out of the freezer.

    4. Chocolate Spritz Cookies
    Again, another recipe from my mom's mom and her cookie press.  These are my mom and Opa's favorite cookies, while I don't enjoy chocolate, I love to make them to share with my family.

    5. Kris Kringle Cookies
    These are the "new" cookies on the block.  I love almond cookies and we received this cookie mold as a gift in the early 1990s and they were added to our cookie line up.

    So those are my top five cookies that I make each and every year.  How many different cookies do you make each year?  What is your favorite traditional recipe?  Feel free to share!  Have a wonderful holidays everyone!

    Linking Up
    Linking up:
    Monday
    A Round Tuit, Masterpiece Monday, Market Yourself Monday, Recipe Sharing Monday, Melt in Your Mouth Monday, Motivate Me Monday, Made by You Mondays, Made with Love, Craft-O-Manic Monday, Sweet Sharing Monday, Marvelous Mondays, Mix it Up Mondays, Make it Pretty, Mop It Up Monday, Busy Monday,
    Wednesday
    Thursday
    Weekend
    Weekend Wrap Up, Strut Your Stuff, Check me Out , Show and Tell, Saturday Spotlight, Great Ideas, Your Great Idea, Share it Saturday, Saturday Sunday Showcase, Think Pink, Nifty Thrifty Sunday, Not Baaad Sunday, Scrumptious Sunday Recipe Link Party, That DIY Party,Overflowing with Creativity Party, A Bouquet of Talent, Will Cook for Smiles

    Related Posts Plugin for WordPress, Blogger...