Showing posts with label papercrafts. Show all posts

Wednesday, November 19, 2014

Manly Happy Birthday

I know I have been absent from the craft posts for quite awhile.  I've been working on lots of little things, but keep forgetting to take pictures!
November is a busy month for birthdays in my family.  My dad, brother in law, father in law, husband and godson are all born in November - it's a busy month!  Today, I wanted to share some cute cards I made for my dad and father-in-law for their birthdays.  These cards would also make great Father's day cards!
The idea is based off of a cardmaking class I took once, but I adjusted it based on what I had on hand.

First you will need to cut your "suit" fabric.  One piece should be 3 1/4 inches by 5 1/2 inches.  The other side should be 1 1/2 by 5 1/2 inches.
Inked edges of both pieces of paper.
Now you need to create the fold for the lapel.  To do this, on the top of the larger piece of paper, make a mark 2 inches from the top left corner, and a mark 3 inches on the left side from the bottom.  Score along this line to connect the two marks and fold back.
If you are using double sided designer paper - you are all set.  I was using designer paper, and didn't like the coordinating side, so I cut a piece of the teal paper to cover up the folded back piece.
On the smaller piece of paper, make a mark on the left edge, five inches from the bottom.  On the right side, make a mark 3 inches from the bottom.  Score between the two marks and fold back.
Using a tape gun or your adhesive of choice, adhere the narrow piece of paper.  Then apply the larger piece of paper, overlapping the smaller piece of paper slightly.
Trim off the overhang from your lapel on the smaller piece of paper.
Stamp on your Sentiment.
Adhere buttons using glue dots.
For the bow tie, use a punch or trace a bow tie shape and adhere using foam squares. I traced mine as I don't have a bow tie punch!


Buttons are from Jo-Anne's
Sentiment is Paper Smooches

Linking up at some of these great parties!


Wednesday, July 30, 2014

Wedding Dress Shower Invitation set

As I mentioned earlier this week, my brother is getting married at the end of this week - such excitement!  Of course, we had to celebrate welcoming my brother's fiance into our family.  I'm so excited to be gaining a sister.  It's always been just my brother and I, it's nice to see our family growing a bit as we get married.  To celebrate the upcoming wedding, I offered to host a shower for my side of the family.  I had lots of fun putting my Silhouette to use (and some of my new found Royal Icing skills!)

Invitations
First off, I made the shower invitations.  I looked at hundreds (ok maybe not hundreds, but it seemed like it) of ideas on Pinterest.  And then I ran out of time, lol, and needed something relatively simple.  This idea fit the bill for the most part.  I used a dress card from the Silhouette store, but cut it in half.  
First I wrote out my text in Microsoft word so I could use the spell check.  Then I transferred my text and placed a text box inside the dress shape in Silhouette Studio. Next i used the print and cut feature (my first time!), to cut out two dresses per sheet of paper.  I cut the top half of the dress out of a pretty silver paper and glued that on top of the dress with the text.  Then I used a hot glue gun to glue the tulle over the top, an finally added a blue bow (to hide my glue marks!).  
Other than the fact that neither my mom or I caught the fact that I wrote down 2013 instead of 2014, I was really really happy with how these turned out :)


Gift - Dishcloths and Thank Yous
So once the invitations were out, I needed to come up with a gift for the lucky bride to be.  I wanted to come up with something small, but useful for my future sister in law.  Keeping with her wedding theme of blue and sliver, I made her some blue dishcloths (because I make a pair for every bridal shower I'm invited to), and then I decided to make some thank you notes to match the invitations.  When my aunt threw a shower for me when I was engaged, she gave me a set of thank you notes that matched the invitations that had been sent out.  I found it to be a very thoughtful gift and it made it very easy to quickly write my thanks yous after the shower.  Since this was my first time hosting a shower on my own, I wanted to do the same thing for my future sister-in-law.
I used the same dress card pattern as I did for the invitations, but added blue ribbons and a thanks stamp from Paper Smooches. 

Dessert
I made a simple meal for lunch during the shower, but I wanted to go a little bit fancier for dessert.  After checking with the bride to be, I learned that she preferred cookies over cake (which was just fine with me).  This gave me another chance to practice my royal icing skills.  I found a dress cookie cutter at Williams Sonama and decided to make hearts for something a little smaller (and simpler!).  The cookies were definitely a big hit with my guests!  I put their initials on the hearts and created white dresses with blue sashes and bows.  


Now to prep desserts for the grooms dinner and pack for a weekend full of fun!
Have a great day!


Linking up at some of these great parties!

Wednesday, July 2, 2014

Lamp Post Cards

So now that school is out, I'm finally having some more time for crafting (yay!).  One thing I want to do quite a bit of this summer is make some cards, both for myself, my family, and some for Operation Write Home as well.  I sent off my first package of cards to Operation Write Home at the end of May, and I'd like to send even more before the summer is over.  I have a goal of making at least 52 cards this year (my first year participating), one for each week.  Some people send in hundreds of cards (amazing!) but I'm trying to not overwhelm myself and just starting out with averaging one per week.  You can check out my progress over time on my sidebar :)


I'm really really really happy with how these cards turned out.  They were pretty simple to make, once I got the idea in my head (hardest part of card making for me - coming up with ideas of how the card should look!).

The background paper is from Michaels
The black silhouette was cut using my Cameo and is a shape from the Silhouette store
The sentiments are Paper Smooches
Have a great rest of the week!
Linking up at some of these great parties!


Friday, February 28, 2014

Birthday Present Card

I am totally loving my Silhouette.  It has been sooooo helpful in making fun cards.  For example, this fun birthday card today - all I had to do was buy the shape in the store and then cut it out - easy peasy.  I love it!  It's great when I don't have a ton of time and need a card in a hurry.
It's been great sharing my cards with you this month for #LetterMo.  I hope you have enjoyed seeing what I've been up to.  I know my card making has a long way to go, but I'm still learning.
Have a great weekend!

Thursday, February 27, 2014

Birthday Numbers

This morning I have another birthday card to share with you (I've been busy making birthday cards for the next few months, before I have to put my cardmaking supplies away - right now they are taking over the living room!)  I found a card similar to this on Pinterest and immediately loved it.  I thought it would be a great way to celebrate special milestone year birthdays.   
I do apologize for the bad picture.  The light was all goofy this morning and I was struggling with the black cardstock.
 
I cut the numbers out with my Silhouette and that's out it - it was an easy card to make!
 
Linking up at some of these great parties!

Wednesday, February 26, 2014

Light of my Life

Welcome back to todays Month of Letters/Month of cards post.  This is actually not a card that I mailed, but I did make it this month.  It was my valentine card for my husband.  He loves laterns and I thought it was a fitting card for him.  It makes a great card to let someone know how special and important they are to you.
 
 
The latern was cut using my Silhouette and an image from the Silhouette store.
The sentiment was made using my alphabet stamp.
 
Have a great day!
 
Linking up at some of these great parties!

Tuesday, February 25, 2014

Bee Thrilled for you

A few months ago, I had a TON of people having new babies - like four in the same week!  It was crazy!  As a result, I had lots of baby showers to go to and needed lots of baby cards.
This card I sent to my best work buddy after she had her baby to congratulate her.


The love bug was cut from the Cricuit Creative Critters 2 Cartridge
Background paper from Michaels
Sentiment is Paper Smooches

Linking up at some of these great parties!

Wednesday, February 12, 2014

Birthday Candles

Happy Birthday!  Actually I don't know anyone who has a birthday today, but I just love this little card :)  I combined some ideas off of Pinterest to create it.
The candles are (obviously) just cut out of paper.  For the solid color candles, I dry embossed them using my cuddlebug to give them a wee bit of deminsion.  Although it doesn't show up real well in the picture, the black background is also dry embossed with the swirly folder. 
For the "flames" I cut those using my Silhouette, I also used some orange ink around the edges of the flames.  Have a great day and Happy Cardmaking!
 
Linking up at These Great Parties

Tuesday, February 11, 2014

Red Cards

Welcome to another #LetterMo and Month of Cards post!  So far I haven't missed a day of mailing something :)  My first round of Valentines are going out in the mail today - so excited!
For today's cards, I'm sharing a pair of red cards.  My mom loves the color red!  These are her birthday and mother's day cards from last year. 
I know these are definitely not fancy cards by any means.  I made them all by myself last spring, they were some of the first cards I attempted without my good friend from Madison guiding me - we all have to start somewhere!
The Happy Everything card and the birthday hats are my first (and maybe only :-o) attempts at coloring with shading markers.  I have a lot to learn there!  Actually, I just have a lot to learn about card making in general. Oh well, I'm still having fun!
Happy Everything - Stamp from paper smooches, dry embossed red card stock, stamp from the Michael's dollar bin, colored with shading markers
Happy Mother's day - paper from Michaels, Cut out from Cricut Create a Critter 2 cartridge

Linking up at These Great Parties


Friday, February 7, 2014

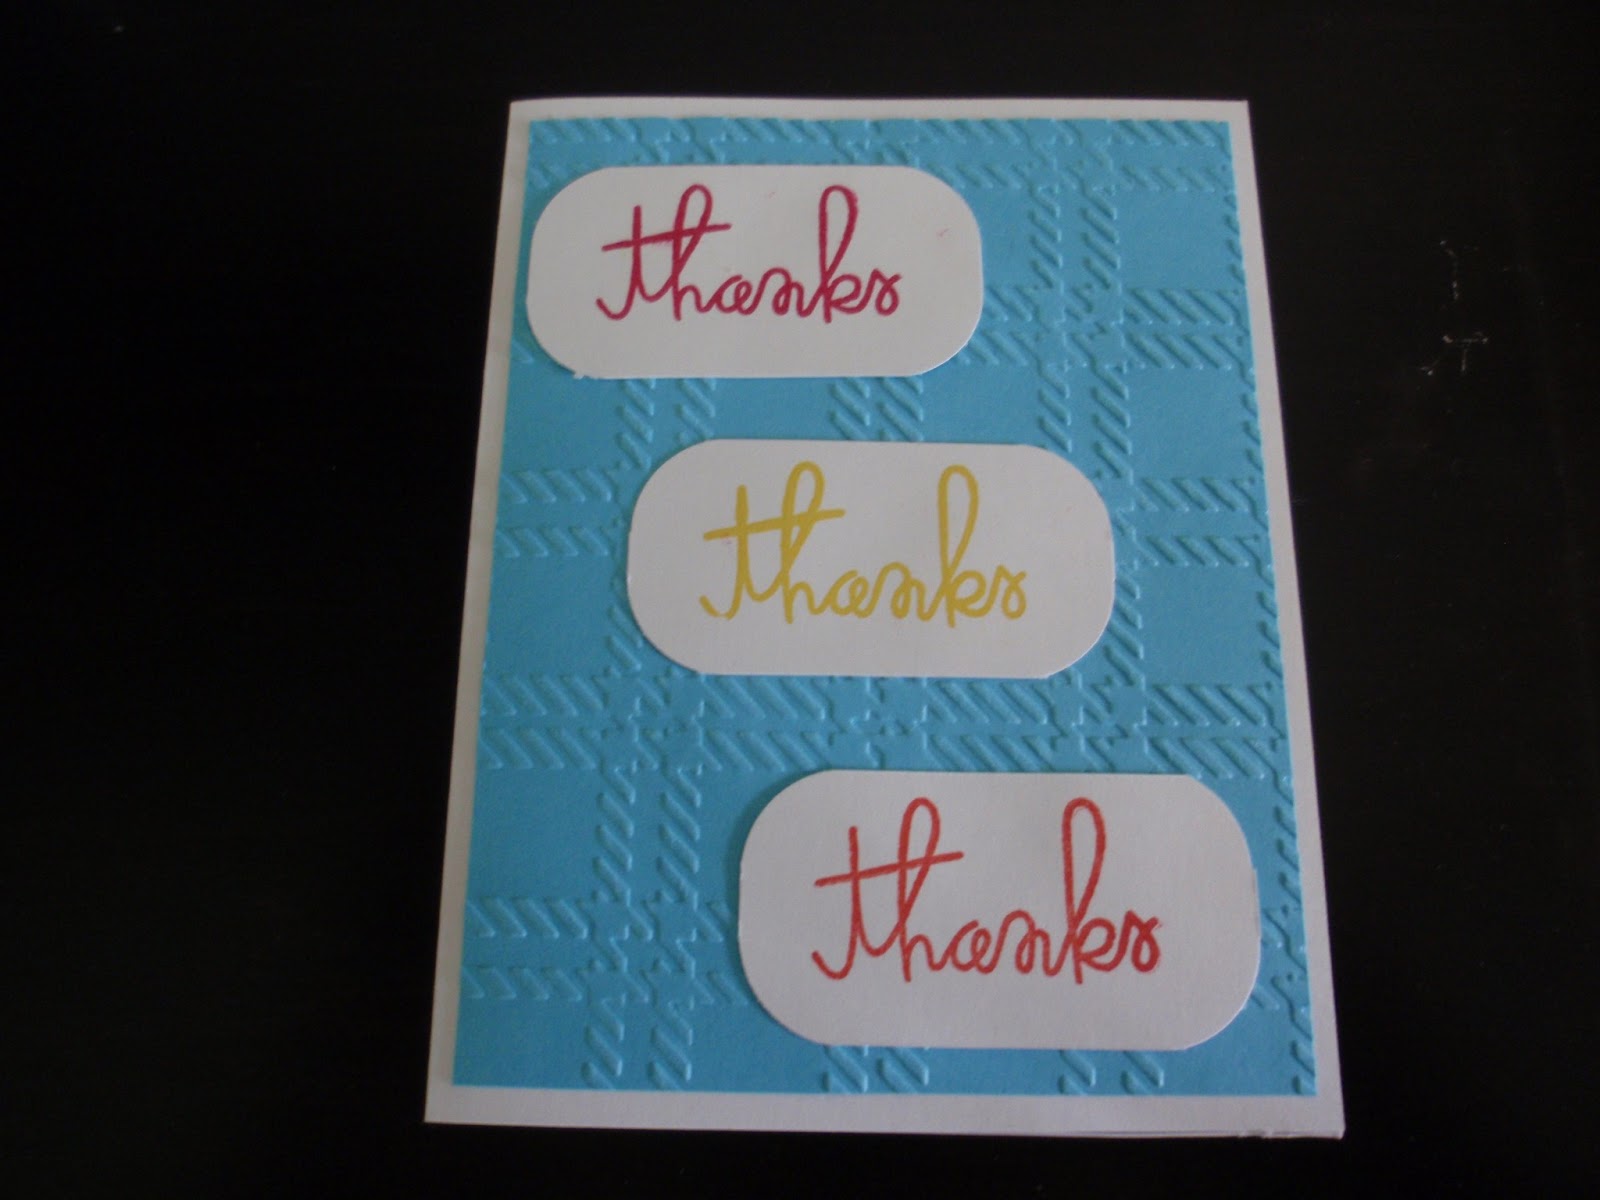
Three Thanks

Good things come in three, right?  Show a friend or family member your gratitude with this simple card.  
The stamp is from Paper Smooches
The background paper is embossed with my Cuttlebug


What are three things you are thankful for today?
I am thankful for
1. That it is finally Friday! And I can watch the opening ceremonies of the Olympics tonight :)
2. That I get to celebrate my best friend's upcoming wedding at her first bridal shower tomorrow
3. That it is NOT below zero today, seriously, after this winter, anything above 10 degrees feels ... well... warm.

Have a great weekend!

Linking up at These Great Parties 

Wednesday, February 5, 2014

Balloon Cards

I love these little cards.  They make me smile. I like the clouds and the balloon floating away.  My good friend gave me a card similar to this for one of my bridal showers.  That card is what really sparked my interest in learning to make my own cards. 
The clouds are cut using a cloud whole punch from Fiskars
The balloon is a 1 inch circle punch (with a stick on rhinestone accent)
The blue paper was run through my Cuddlebug using the swiss dots folder.  
The stamps are from Paper Smooches and embossed with red sparkly embossing powder
Happy Wednesday!

Linking up at These Great Parties 

Tuesday, February 4, 2014

Hello Card

Welcome to my first Month of Cards post :)  I'm very excited for this month!
Yes, it's only day three of mailing in February, but I have gotten a card in the mail each day, so I'm off to a good start.
Today I'm sharing this super simple hello card that I made with my Silhouette.  The hello was a free shape a few weeks ago, and I learned how to offset the grey on the Silhouette blog.  Offsetting the type worked perfect to help the words "pop" in this card. 
For anyone who knows me, this is a perfect card for me and I love my purple hello card!  I think I'm going to make more of these in other color combinations to have on hand.
Have a great day and happy card making/letter writing!

Card Specs:
Background paper - Michaels
Hello lettering - Silhouette Online Store  # 53674

Linking up at These Great Parties 

Wednesday, January 8, 2014

Birthday Card Organizer

Welcome to 2014!  I can't believe we're already into January.  I know many people have set organization goals for themselves for the year, and I wanted to share a quick tutorial with you to help you stay organized and make sure you don't forget any birthday's this year!
I've recently gotten into card-making (stay tuned for more posts on this!) and one thing I wanted to do was make handmade cards for all of my friends and family this year.  I like to plan ahead and put forth my best effort, and not be rushing to finish a card on the day I have to mail it.  So I decided to make a birthday card organizer so that when I have time, I can make my cards for the next few months and then they will be all organized and ready to go when they need to go in the mail!
What you Need:
  • Mini Binder (I got mine at Target)
  • Avery Mini binder folders (2 packets of 5) or Mini sheet protectors
  • 12 sheets of cardstock
  • Post it notes
  • Optional - cutting machine like Cricut or Silhouette

What to Do:
This project is really pretty simple.
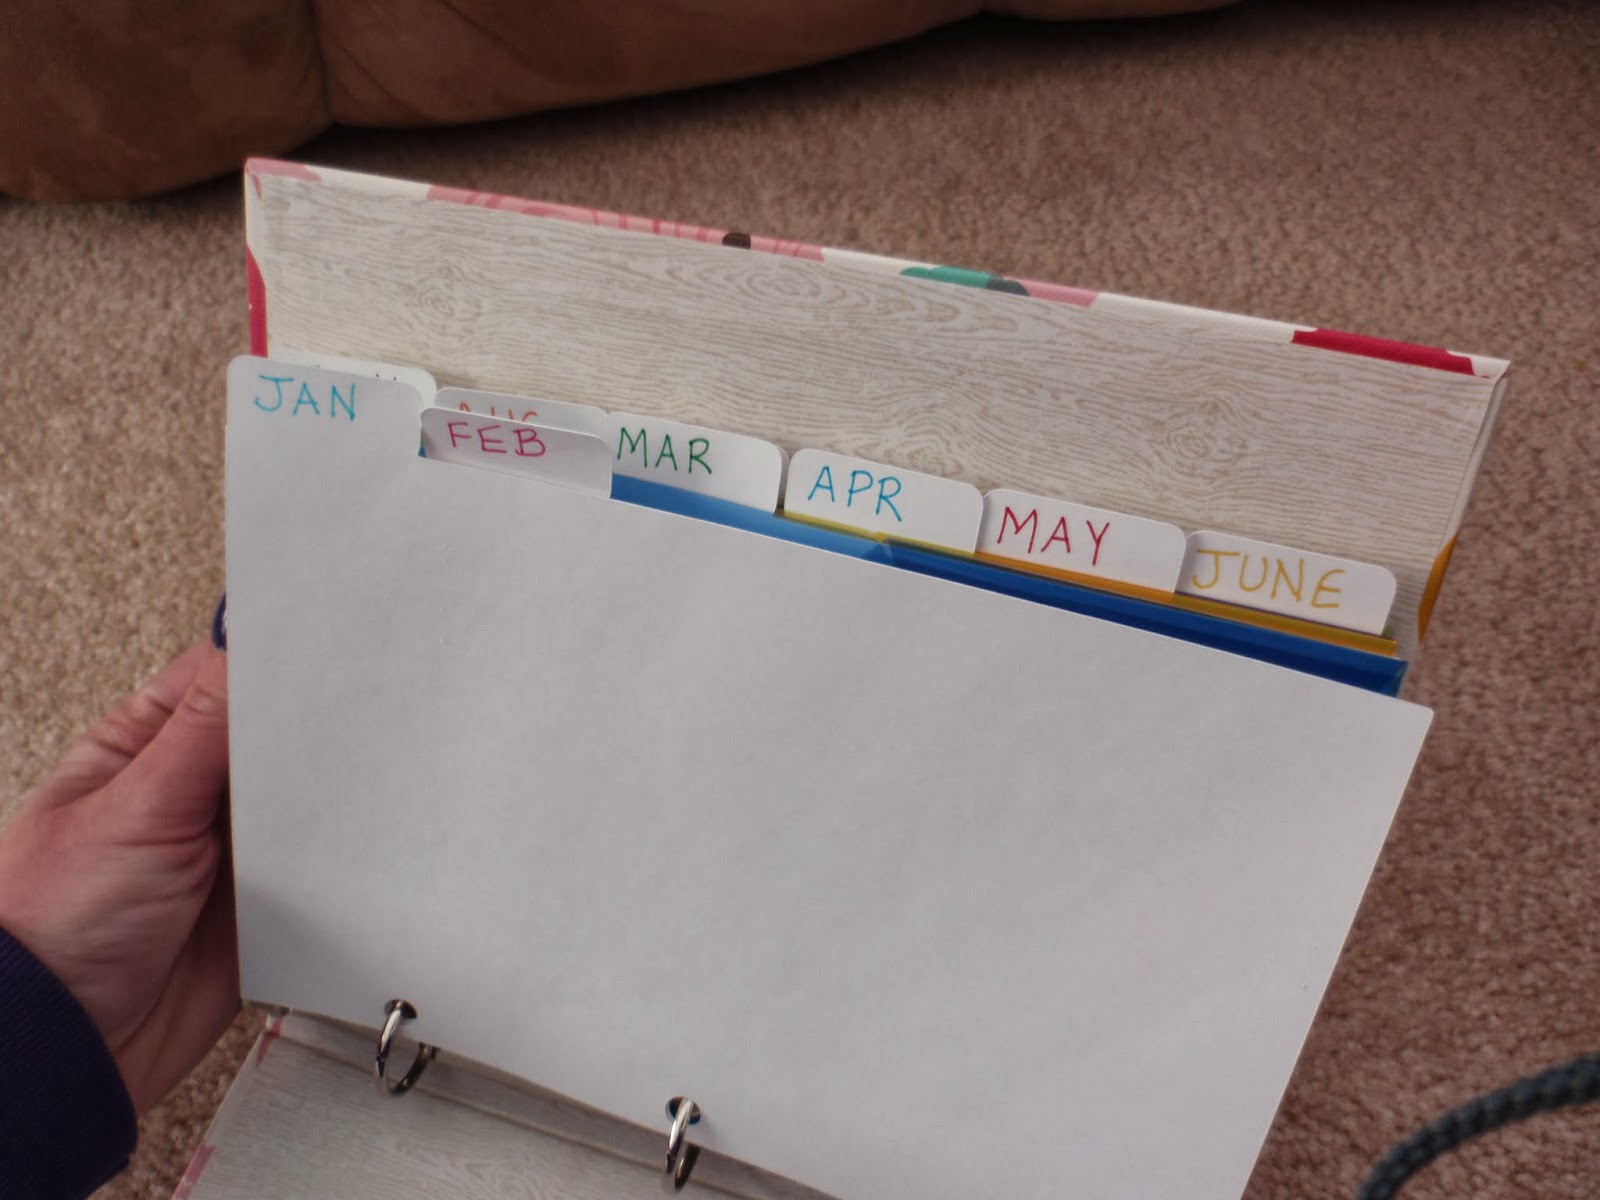
Using your cardstock, you are going to cut out tabs/dividers.  Hole punch and label them for each month.
You can either cut out the tabs and hole punch them by hand (just trace around them to create your own template).  Alternatively, you can use a Cricut or Silhouette to cut them out for you.  I got a Silhouette in their After Thanksgiving Sale and I love it!  This is my first big project with it and I'm so happy with how it turned out!  I designed my own set of six tabs for mini binders with three holes.
Use post it notes to write out holidays or birthdays for each month.
Place the Avery folders behind the tabs and there you go!  You can plan out your next few months of card giving and keep them all together so you are prepared when holidays or birthdays come up!  Place your cards in the folders and you'll be all ready and make sure to not forget a birthday! 
If cardmaking is not your thing, you can also create this and use it to store bought cards instead.
One thing to note, the folders only come in packs of five.  It works out fine for me, since I have two months where there are not birthdays, so it's fine for me.

If anyone can tell me how to save and share the silhouette cutting file or turn it into a free SVG file, I'd be happy to share the mini binder tabs I designed!
*Note, I think I can e-mail the Silhouette cutting file I made - e-mail me if you would like it!

Edit - Click here to get the download for mini binder tabs.

Good luck with getting organized for 2014!  Have a great week!

 Linking up:
Wednesday
Create and ShareSugar and SpiceWhat I Whipped UpWhatever Goes WednesdayShow me what ya GotWow me Wednesday{Wow Me} WednesdayCast PartyYour Whims WednesdayFluster's Creative MusterWednesday WhatsitShow and ShareDream to Reality, Wow Us Wednesday, A Little Bird Told Me, And Sew We Craft TogetherWe did it!, We Made that!, Two Girls and a Party
Thursday
Catch a GlimpseChic and CraftyThursday Favorite Things, Live Laugh LinkyCreative PrincessShare your Cup, , Blooming Linky PartyLink it UpMade you Look,  Blog StalkingWildly OriginalShowcase your TalentSomewhat SimpleKeep Calm and Link UpFive Little ChefsLamberts LatelyInspire Us Thursday, Weekly CreativeAll Things Pretty
Friday
Show and Tell FridayFriday Favorites,Lovely Crafty WeekendWeekend WanderWeekend Bloggy ReadingFlaunt it Friday504 MainFriday FavsFancy This Friday, Flash Blog Friday, Finished FridayFreedom FridayShow off Friday, Keep Calm and Link Up, Weekend Wonders, I'm loving it, Friday FavsPity Party, Dare to Share, F Friday, Craftionary Link Party, Do Something Crafty, Get CraftyShine on Friday!
Weekend
Weekend Wrap UpStrut Your StuffCheck me Out Show and TellSaturday SpotlightYour Great IdeaShare it SaturdaySunday ShowcaseThink PinkNifty Thrifty SundayNot Baaad SundayThat DIY Party,  A Bouquet of TalentWeekend Creative

Monday

Wednesday, December 4, 2013

10 Handmade gifts in an afternoon

We have officially passed Thanksgiving and now many thoughts turn towards the winter holiday season.  Many times handmade Christmas or Holiday gifts need a ton of planning and need to be started months in advance.  But not the ones listed below!  These can all easily be made in an afternoon or some evening after work.
Handmade gifts are generally much cheaper than store bought ones and don't have to be cheesy or look homemade.  Many people greatly appreciate the time and effort it took to make something homemade.  So give it a go!  Try your hand at some homemade gifts this year!
If you have any questions about any of the projects, please let me know!

1. Painted Picture Frame
This simple project can be done in less than an hour, easily.  These make great presents for best friends or loved ones.  Wouldn't grandma and grandpa love a picture of them with their grandchildren in a decorated frame?  Or even for your significant other to put on their desk at work.  I have made several of these over the years and they have been a big hit. 

2. Hooded Towel
I have now made 3 different hooded towels for baby shower gifts.  I love love love to make them.  They always take a little longer than I anticipate, but they can certainly be easily finished in an afternoon (even with a break!).  I have made a penguin, a ladybug, and a dragon (post on that one will be up next week).  These would make great gifts for babies or toddlers.  Or use a bigger towel to make one for a bigger person :)

3. Gift Card Holder
Sometimes you are at a loss at what to give someone and you want to go the easy route with a gift card.  Dress up that gift card with this gift card holder!  It's perfect for storing gift cards, business cards, or store loyalty cards.  You probably have everything you need right in your sewing bin and it's easy to customize to the person you are giving to by using their favorite colors.  Make a gift card a little more personal by giving it in a homemade gift card holder!

4. Stamped Notepads
Who doesn't need a notepad to keep track of all the busy thoughts in your head.  Using the directions in this post, you will see how quick an easy it is to make a notepad for someone you love.  Use their favorite colored paper or a cute stamp set to make a personalized notepad.

5. Card Set

Letter writing may be a lost art, but cardmaking is making a huge comeback.  You don't need a ton of special supplies to make cards.  In fact, you can use some simple paper and stamps and turn out beautiful cards.  If you have a few more supplies and want to try your hand at embossing to make some fancier cards - go for it!  Thank you notes or blank note cards can always be put to good use. 

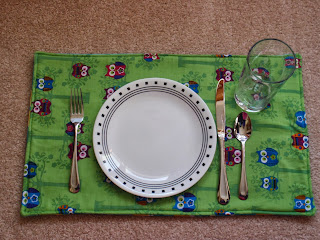
6. Placemats
http://peanutlifeadventures.blogspot.com/2013/11/placemats.html
I did in fact, make these placemats for a gift this fall.  I love the ability of homemade gifts to fit the person getting them.  I knew I wanted to do something with owls for my dear friend, so I found some fun owl material and made her some cute placemats.  Fun but practical!  Make some personalized holiday ones, or ones that can be used all year.  Super simple to make - just four straight lines and a simple pattern!

7. Pincushion
This project truly can be completed in less than 30 minutes, and can be make from leftover fabric and ribbon.  If you have a crafty friend, make a pincushion for them that they can tie onto their sewing machine!

8. Photo Coasters
If you are a budding photographer, showcase some of your favorite prints by making them into a coaster set.  Or you can use family snap shots for mom and dad or grandparents.  These are super simple to make - give them a try!

9. Reversible Headband
One of my favorite projects and so quick and simple to make.  These reversible headbands would make a great stocking stuff or small add-on in a present.  Easily customizable using a favorite fabric or color.  These are so easy to make, you can make a pair in less than an hour!

10. Quick and easy dischloth
My final idea for you are these quick and easy discloths.  Pop in your favorite Christmas movie and get out your needles and yarn.  By the time the movie is over, you will have a handmade dishcloth ready for gifting.  These make great hostess gifts for someone having a holiday party.  They are also a great gift for any young couple.  


I hope you enjoy these ideas and they get your creative juices flowing.  If you have any questions, please let me know.  Happy Holiday Season!

Linking up:
Wednesday
Create and Share, Sugar and Spice, What I Whipped Up, Whatever Goes Wednesday, Show me what ya Got, Wow me Wednesday, {Wow Me} Wednesday, Cast Party, Your Whims Wednesday, Fluster's Creative Muster, Wednesday Whatsit, Show and Share, Dream to Reality, Wow Us Wednesday, A Little Bird Told Me, And Sew We Craft Together, We did it!, We Made that!, Two Girls and a Party
Thursday
Catch a Glimpse, Chic and Crafty, Thursday Favorite Things, Live Laugh Linky, Creative Princess, Share your Cup, , Linky Party, Link it Up, Made you Look, Inspiration in Progress, Blog Stalking, Wildly Original, Showcase your Talent, Somewhat Simple, Keep Calm and Link Up, Five Little Chefs, Lamberts Lately
Friday
Show and Tell Friday, Friday Favorites, Simply Create, Lovely Crafty Weekend, Weekend Wander, Weekend Show Off, Weekend Bloggy Reading, Flaunt it Friday, 504 Main, Friday Favs, Fancy This Friday, Flash Blog Friday, Finished Friday, Freedom Friday, Show off Friday, Happy Hour, Keep Calm and Link Up, Weekend Wonders, I'm loving it, Friday Favs, Pity Party, Dare to Share, F Friday, Craftionary Link Party, Do Something Crafty, Get Crafty, Shine on Friday!
Weekend
Weekend Wrap Up, Saturday Spotlight, Strut Your Stuff, Check me Out , Show and Tell, Saturday Spotlight, Your Great Idea, Simply Sweet Saturday, Share it Saturday, Saturday Show and Tell, Craft Create Inspire, Sunday Showcase, Think Pink, Nifty Thrifty Sunday, Not Baaad Sunday, That DIY Party, Overflowing with Creativity Party, A Bouquet of Talent, Weekend Creative

Monday

Wednesday, July 31, 2013

Cardmaking Series Part 2: Embossing

Welcome back to the card making series :)
Last time, we learned about making simple cards, using just stamps and paper.
This week we are going to take it up a notch and talk about embossing to dress up your cards.  Embossing is a great way to add some glam or sparkle to your cards and make them stand out.
The process is really simple, but will require a few new supplies
(these links are NOT affiliate links, I'm just trying to show you some examples)
To do embossing, you will need


You can emboss using any stamp that you have.
To emboss, you simply take your stamp, using the embossing ink (or regular ink) and stamp your design on the paper.  Moving quickly, sprinkle the embossing powder on the wet ink.  The embossing powder should stick to the ink.  Tilt the paper and tap gently to remove the excess powder.  I use am embossing tray to so that I don't waste any powder.
Then using an embossing gun (or toaster, or hair dryer, or other heat source), you heat up the embossing powder until it just melts and becomes shiny (overheating can cause it to look burned - and be careful of your fingers!).  And that's it!
Here are some examples of cards that I have used embossing powder on.

The colored glitter in these one were done with a glitter glue like pen called Stickles.


Linking up here:
Wednesday
Create and ShareSugar and SpiceWhat I Whipped UpWhatever Goes WednesdayShow me what ya GotLil LunaWow me Wesdnesday{Wow Me} WednesdayCast PartyYour Whims WednesdayFluster's Creative MusterWednesday WhatsitShow and ShareDream to Reality, Wow Us Wednesday, Super Linky PartyWhat We Wore, Read, and Made, Whatcha Work-Up, A Little Bird Told Me, And Sew We Craft TogetherWe did it!, We Made that!, Two Girls and a Party
Thursday
Hooking up with HoHCatch a GlimpseCreative JuiceChic and CraftyThursday Favorite Things, Live Laugh LinkyCreative PrincessShare your Cup, , Linky PartyLink it UpMade you Look, Inspiration in ProgressBlog StalkingWildly OriginalShowcase your TalentSomewhat SimpleKeep Calm and Link UpFive Little ChefsCommercial BreakLamberts Lately
Friday
Show and Tell FridayFriday FavoritesSimply CreateLovely Crafty WeekendEBKTSWeekend WanderWeekend Show OffWeekend Bloggy ReadingFlaunt it Friday504 MainFriday FavsFancy This Friday, Flash Blog Friday, Finished FridayFreedom FridayShow off Friday, Happy HourKeep Calm and Link Up, Weekend Wonders, I'm loving it, Fiday FavsPity Party, Dare to Share, F Friday, Craftionary Link Party, Do Something Crafty, Get CraftyShine on Friday!
Weekend
Weekend Wrap UpSay G'daySaturday SpotlightStrut Your StuffCheck me Out Show and TellSaturday Spotlight,  Your Great IdeaSimply Sweet SaturdayShare it SaturdaySaturday Show and Tell,  No Rules Blog PartyCraft Create Inspire,  Sunday ScoopSunday ShowcaseThink PinkNifty Thrifty SundayNot Baaad SundayThat DIY Party,  Overflowing with Creativity PartyA Bouquet of TalentWeekend Creative

Monday

Related Posts Plugin for WordPress, Blogger...