Showing posts with label sewing. Show all posts

Wednesday, January 22, 2014

DIY Camera Strap Cover

Today I have a super quick and simple sewing tutorial to share with you.  DSLR cameras are becoming very popular, but they are so boring and all look the same!  This quick little project will give you a chance to dress up your camera strap and make it your own.


What you need:

  • Two or more scraps of coordinating fabric
  • Interfacing
  • Iron
  • Thread to match


What to do:
First things first - measure your camera strap that you already have.  Mine was 1.5 inches wide and 21 inches long.  Double the width and add one (yes, I know, you need to do just a bit of math!), and add one inch to the length.  You can either your strap out of one piece of fabric or piece coordinating scraps together.  I pieced together fabric that was 4 inches wide (1.5 inches doubled is 3 inches plus one for seams and ease = four inches) and 22 inches long.
If you pieced your fabric together, iron the seams flat.
On both short ends, fold fabric over 1/4 inch and sew a hem.
Iron your interfacing onto the wrong side of the fabric. Interfacing should be the same width as your fabric and the length of your camera strap.

I know it's hard to see the hem on this picture, but it's there!  And don't place your interfacing over the hem
Fold right sides together, pin, and sew down the long open side.
Turn fabric right side out.
Place the seam in the middle and iron, seam side down.

Thread your camera strap through and enjoy your new (cooler) looking camera!


 Linking up:
Wednesday
Create and ShareSugar and SpiceWhat I Whipped UpWhatever Goes WednesdayShow me what ya GotWow me Wednesday{Wow Me} WednesdayCast PartyYour Whims WednesdayFluster's Creative MusterWednesday WhatsitShow and ShareDream to Reality, Wow Us Wednesday, A Little Bird Told Me, And Sew We Craft TogetherWe did it!, We Made that!, Two Girls and a Party
Thursday
Catch a GlimpseChic and CraftyThursday Favorite Things, Live Laugh LinkyCreative PrincessShare your Cup, , Blooming Linky PartyLink it UpMade you Look,  Blog StalkingWildly OriginalShowcase your TalentSomewhat SimpleKeep Calm and Link UpFive Little ChefsLamberts LatelyInspire Us Thursday, Weekly CreativeAll Things Pretty
Friday
Show and Tell FridayFriday Favorites,Lovely Crafty WeekendWeekend WanderWeekend Bloggy ReadingFlaunt it Friday504 MainFriday FavsFancy This Friday, Flash Blog Friday, Finished FridayFreedom FridayShow off Friday, Keep Calm and Link Up, Weekend Wonders, I'm loving it, Friday FavsPity Party, Dare to Share, F Friday, Craftionary Link Party, Do Something Crafty, Get CraftyShine on Friday!
Weekend
Weekend Wrap UpStrut Your StuffCheck me Out Show and TellSaturday SpotlightYour Great IdeaShare it SaturdaySunday ShowcaseThink PinkNifty Thrifty SundayNot Baaad SundayThat DIY Party,  A Bouquet of TalentWeekend Creative

Monday

Tuesday, December 31, 2013

Top 10 post in 2013

I can't believe the end of the year is already upon us.  Where has the time gone?
I've rounded up my top 10 most viewed posts for this past year and wanted to share them with you in case you missed any.

Have a wonderful new year and thanks for reading Peanut Life Adventures!


It's hard to believe I've been blogging for over a full year now - and what a year it has been!  Thanks so much for your support this year!  I can't wait to share more with you in 2014!

Wednesday, December 11, 2013

Dragon Hooded Towel

Happy Wednesday!  Happy Hump Day!  This has been one heck of a week.  My husband is out of town for work this week.  I really don't like it when he's gone for so long.  Things have a way of happening.  Sure enough, my car hasn't started - twice this week.  Once nearly stranding me.  So once I finally made it home, I've been stuck here cause I'm too worried about my car going kaput to go anywhere.
At least the time on my own has given me time to catch up on my house projects and upload pictures to my computer.  
 

Which means I can finally share this gem with you.  My final hooded towel for this year (I think).  As I shared with you last week, in my 10 Handmade Gifts in an Afternoon post, I had one final hooded towel ot share with you.  And here is the dragon hooded towel I made as a big brother gift for my cousin whose new little brother joined the world the day after Thanksgiving.  


The pattern for the dragon again came from Crazy Little Projects.  She is a master at creating hooded towels!  Each one of these hooded towels has gotten easier for me.  So if your first one is a little rough, keep trying, they do get a whole lot easier! (And be sure to check out my Ladybug and Penguin)


I hope you all have a great week, we are halfway to the weekend!  Yay!  Remember to take a deep breath, I know things get crazy at this holiday time.  

Linking up:
Wednesday
Create and ShareSugar and SpiceWhat I Whipped UpWhatever Goes WednesdayShow me what ya GotWow me Wednesday{Wow Me} WednesdayCast PartyYour Whims WednesdayFluster's Creative MusterWednesday WhatsitShow and ShareDream to Reality, Wow Us Wednesday, A Little Bird Told Me, And Sew We Craft TogetherWe did it!, We Made that!, Two Girls and a Party
Thursday
Catch a GlimpseChic and CraftyThursday Favorite Things, Live Laugh LinkyCreative PrincessShare your Cup, , Blooming Linky PartyLink it UpMade you Look,  Blog StalkingWildly OriginalShowcase your TalentSomewhat SimpleKeep Calm and Link UpFive Little ChefsLamberts LatelyInspire Us Thursday, Weekly CreativeAll Things Pretty
Friday
Show and Tell FridayFriday Favorites,Lovely Crafty WeekendWeekend WanderWeekend Bloggy ReadingFlaunt it Friday504 MainFriday FavsFancy This Friday, Flash Blog Friday, Finished FridayFreedom FridayShow off Friday, Keep Calm and Link Up, Weekend Wonders, I'm loving it, Friday FavsPity Party, Dare to Share, F Friday, Craftionary Link Party, Do Something Crafty, Get CraftyShine on Friday!
Weekend
Weekend Wrap UpStrut Your StuffCheck me Out Show and TellSaturday SpotlightYour Great IdeaShare it SaturdaySunday ShowcaseThink PinkNifty Thrifty SundayNot Baaad SundayThat DIY Party,  A Bouquet of TalentWeekend Creative

Monday

Wednesday, December 4, 2013

10 Handmade gifts in an afternoon

We have officially passed Thanksgiving and now many thoughts turn towards the winter holiday season.  Many times handmade Christmas or Holiday gifts need a ton of planning and need to be started months in advance.  But not the ones listed below!  These can all easily be made in an afternoon or some evening after work.
Handmade gifts are generally much cheaper than store bought ones and don't have to be cheesy or look homemade.  Many people greatly appreciate the time and effort it took to make something homemade.  So give it a go!  Try your hand at some homemade gifts this year!
If you have any questions about any of the projects, please let me know!

1. Painted Picture Frame
This simple project can be done in less than an hour, easily.  These make great presents for best friends or loved ones.  Wouldn't grandma and grandpa love a picture of them with their grandchildren in a decorated frame?  Or even for your significant other to put on their desk at work.  I have made several of these over the years and they have been a big hit. 

2. Hooded Towel
I have now made 3 different hooded towels for baby shower gifts.  I love love love to make them.  They always take a little longer than I anticipate, but they can certainly be easily finished in an afternoon (even with a break!).  I have made a penguin, a ladybug, and a dragon (post on that one will be up next week).  These would make great gifts for babies or toddlers.  Or use a bigger towel to make one for a bigger person :)

3. Gift Card Holder
Sometimes you are at a loss at what to give someone and you want to go the easy route with a gift card.  Dress up that gift card with this gift card holder!  It's perfect for storing gift cards, business cards, or store loyalty cards.  You probably have everything you need right in your sewing bin and it's easy to customize to the person you are giving to by using their favorite colors.  Make a gift card a little more personal by giving it in a homemade gift card holder!

4. Stamped Notepads
Who doesn't need a notepad to keep track of all the busy thoughts in your head.  Using the directions in this post, you will see how quick an easy it is to make a notepad for someone you love.  Use their favorite colored paper or a cute stamp set to make a personalized notepad.

5. Card Set

Letter writing may be a lost art, but cardmaking is making a huge comeback.  You don't need a ton of special supplies to make cards.  In fact, you can use some simple paper and stamps and turn out beautiful cards.  If you have a few more supplies and want to try your hand at embossing to make some fancier cards - go for it!  Thank you notes or blank note cards can always be put to good use. 

6. Placemats
http://peanutlifeadventures.blogspot.com/2013/11/placemats.html
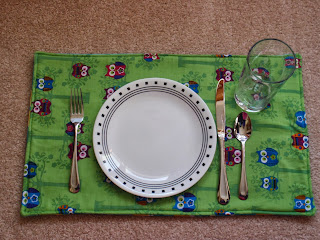
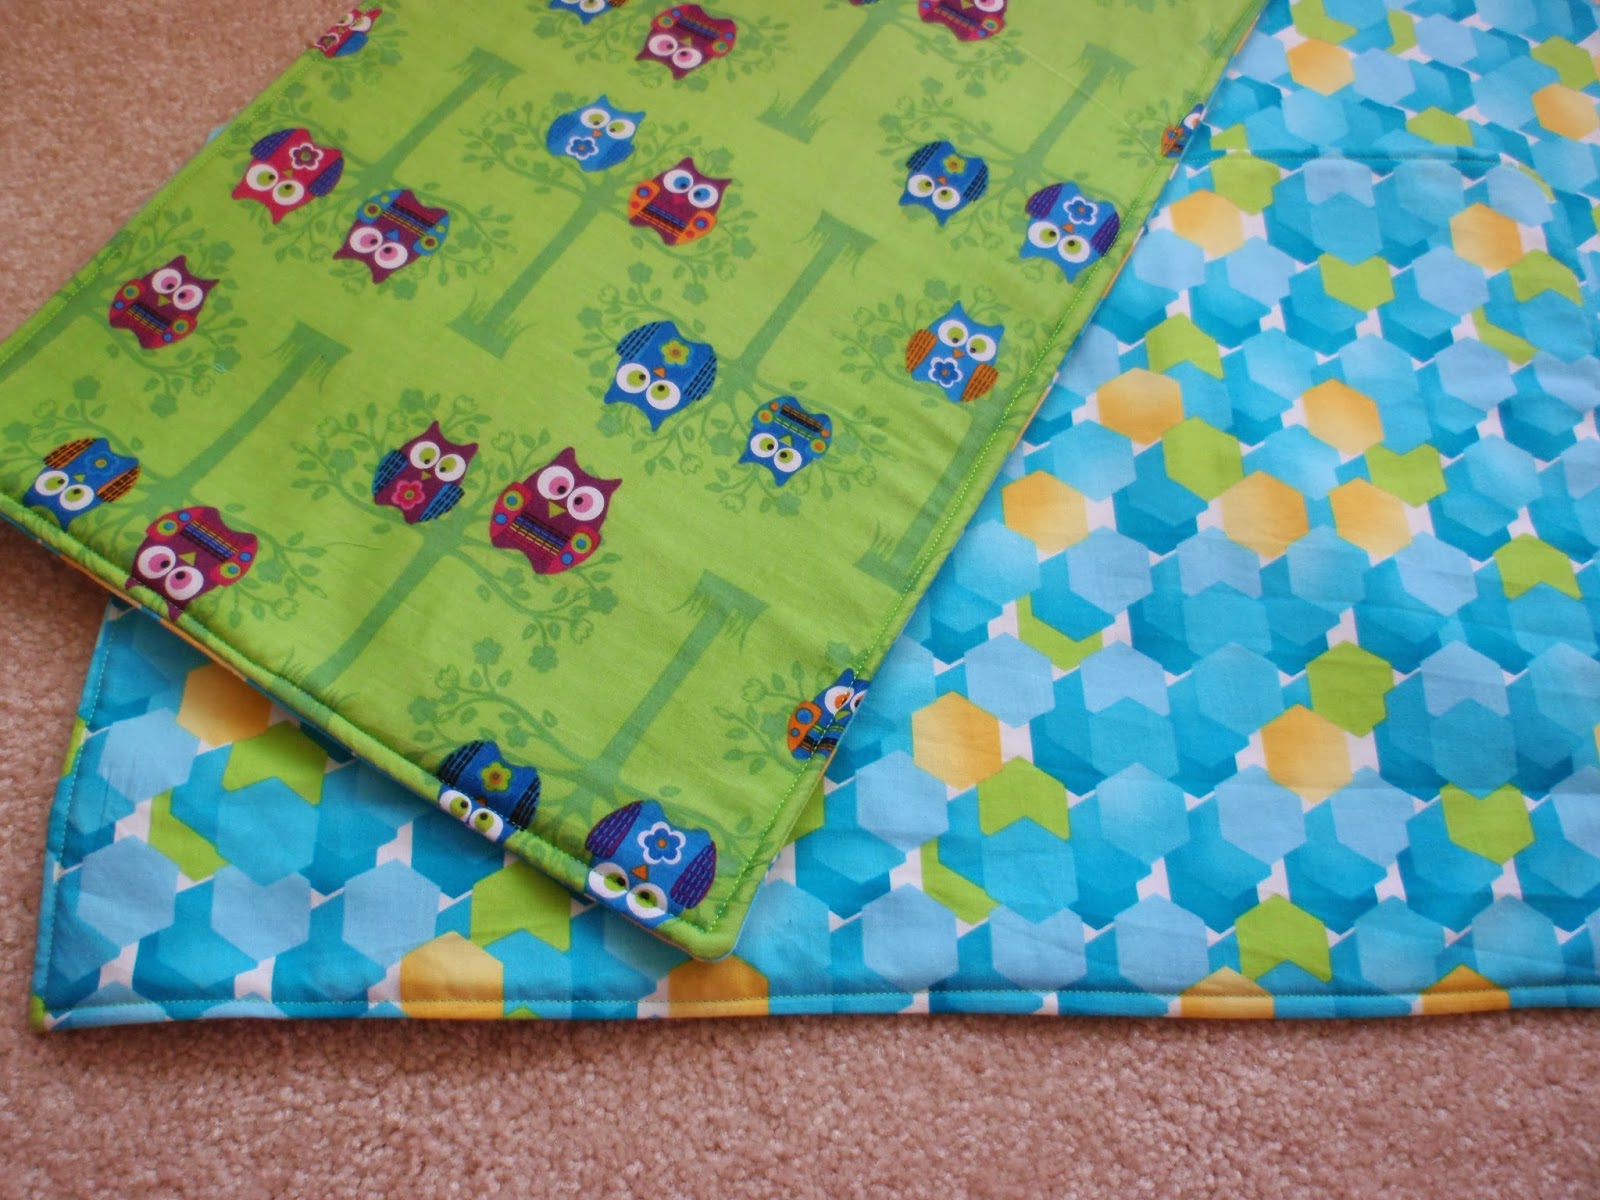
I did in fact, make these placemats for a gift this fall.  I love the ability of homemade gifts to fit the person getting them.  I knew I wanted to do something with owls for my dear friend, so I found some fun owl material and made her some cute placemats.  Fun but practical!  Make some personalized holiday ones, or ones that can be used all year.  Super simple to make - just four straight lines and a simple pattern!

7. Pincushion
This project truly can be completed in less than 30 minutes, and can be make from leftover fabric and ribbon.  If you have a crafty friend, make a pincushion for them that they can tie onto their sewing machine!

8. Photo Coasters
If you are a budding photographer, showcase some of your favorite prints by making them into a coaster set.  Or you can use family snap shots for mom and dad or grandparents.  These are super simple to make - give them a try!

9. Reversible Headband
One of my favorite projects and so quick and simple to make.  These reversible headbands would make a great stocking stuff or small add-on in a present.  Easily customizable using a favorite fabric or color.  These are so easy to make, you can make a pair in less than an hour!

10. Quick and easy dischloth
My final idea for you are these quick and easy discloths.  Pop in your favorite Christmas movie and get out your needles and yarn.  By the time the movie is over, you will have a handmade dishcloth ready for gifting.  These make great hostess gifts for someone having a holiday party.  They are also a great gift for any young couple.  


I hope you enjoy these ideas and they get your creative juices flowing.  If you have any questions, please let me know.  Happy Holiday Season!

Linking up:
Wednesday
Create and Share, Sugar and Spice, What I Whipped Up, Whatever Goes Wednesday, Show me what ya Got, Wow me Wednesday, {Wow Me} Wednesday, Cast Party, Your Whims Wednesday, Fluster's Creative Muster, Wednesday Whatsit, Show and Share, Dream to Reality, Wow Us Wednesday, A Little Bird Told Me, And Sew We Craft Together, We did it!, We Made that!, Two Girls and a Party
Thursday
Catch a Glimpse, Chic and Crafty, Thursday Favorite Things, Live Laugh Linky, Creative Princess, Share your Cup, , Linky Party, Link it Up, Made you Look, Inspiration in Progress, Blog Stalking, Wildly Original, Showcase your Talent, Somewhat Simple, Keep Calm and Link Up, Five Little Chefs, Lamberts Lately
Friday
Show and Tell Friday, Friday Favorites, Simply Create, Lovely Crafty Weekend, Weekend Wander, Weekend Show Off, Weekend Bloggy Reading, Flaunt it Friday, 504 Main, Friday Favs, Fancy This Friday, Flash Blog Friday, Finished Friday, Freedom Friday, Show off Friday, Happy Hour, Keep Calm and Link Up, Weekend Wonders, I'm loving it, Friday Favs, Pity Party, Dare to Share, F Friday, Craftionary Link Party, Do Something Crafty, Get Crafty, Shine on Friday!
Weekend
Weekend Wrap Up, Saturday Spotlight, Strut Your Stuff, Check me Out , Show and Tell, Saturday Spotlight, Your Great Idea, Simply Sweet Saturday, Share it Saturday, Saturday Show and Tell, Craft Create Inspire, Sunday Showcase, Think Pink, Nifty Thrifty Sunday, Not Baaad Sunday, That DIY Party, Overflowing with Creativity Party, A Bouquet of Talent, Weekend Creative

Monday

Wednesday, November 13, 2013

Placemats

Last year was my dear friend's 30th birthday, the first of my friends to celebrate such a milestone.  I really wanted to do something special with her to celebrate, unfortunately, I was a wee bit distracted as I was getting married the day before her wedding.  Since I couldn't celebrate with her last year, I wanted to do something special for her this year for her birthday.  
I chose to make her placemats for two reasons.  1) I know she loves owls and I was trying to think of something I could make that would use owl fabric that would be useful and 2) She received a set of beautiful placements at one of her bridal showers that I was at, so I knew she was a placement person :)
Then I was off on the hunt for some owl fabric.  My fabric store options are fairly limited where I live, but I was able to find a fun owl print.  I know the back side doesn't really match, but I wanted something a little more toned down that her husband would also enjoy.
These placements were fun and simple to make.  Now that I've made a set for a friend, I just might have to make some for me with some fun holiday prints to add to my collection!

What you need:
  • 3/4 yard of two coordinating fabrics
  • 3/4 yard Pellon (or something stiffer to put in the middle)
  • Matching tread
What you do:
Decide what size you want your placemats to be.  I wanted mine to be fairly standard size/on the larger side. 
Cut your fabric one inch larger than you want your finished placemat to be.  I wanted to use my entire 3/4 of a yard of fabric, so I cut 4 pieces 19x13 (for finished placemats 18 inches by 12 inches)
Place your two fabrics right sides facing in.  Lay the Pellon on top.  Pin around the edges.
Using a 1/2 inch seam allowance, sew around all four edges of your placemat.  Leave a 4 inch opening on one short side for turning.  (I know this seems like a big seam allowance, but you really do want it this big!)

Clip your corners (to give you crisp edges when your turn your placemats right side out).  Turn placemats right side out.
 Iron along your opening, pressing the edges in.
Top stitch, using a 1/4 inch seam allowance around all four edges.  This is why it was important to have a 1/2 inch seam allowance.  Top stitching will hold all of your layers in place, even with washing and will close the hole you used for turning. 

 You can also use a fancy or decorative stitch to topstich your edges, or stitch in a contrasting color.  If you want to try your hand at quilting, this would be a nice small project to work with.  Quilting the layers would help hold them in place through many washings, but is not necessary.

I hope you enjoy making your own placemats!  Either for yourself or as a gift.  If you have any questions, let me know.
Have a great day!

Linking Up:
Wednesday
Create and ShareSugar and SpiceWhat I Whipped UpWhatever Goes WednesdayShow me what ya GotWow me Wednesday{Wow Me} WednesdayCast PartyYour Whims WednesdayFluster's Creative MusterWednesday WhatsitShow and ShareDream to Reality, Wow Us Wednesday, A Little Bird Told Me, And Sew We Craft TogetherWe did it!, We Made that!, Two Girls and a Party
Thursday
Catch a GlimpseChic and CraftyThursday Favorite Things, Live Laugh LinkyCreative PrincessShare your Cup, , Linky PartyLink it UpMade you Look, Inspiration in ProgressBlog StalkingWildly OriginalShowcase your TalentSomewhat SimpleKeep Calm and Link UpFive Little ChefsLamberts Lately
Friday
Show and Tell FridayFriday FavoritesSimply CreateLovely Crafty WeekendWeekend WanderWeekend Show OffWeekend Bloggy ReadingFlaunt it Friday504 MainFriday FavsFancy This Friday, Flash Blog Friday, Finished FridayFreedom FridayShow off Friday, Happy HourKeep Calm and Link Up, Weekend Wonders, I'm loving it, Friday FavsPity Party, Dare to Share, F Friday, Craftionary Link Party, Do Something Crafty, Get CraftyShine on Friday!
Weekend
Weekend Wrap Up,  Saturday SpotlightStrut Your StuffCheck me Out Show and TellSaturday SpotlightYour Great IdeaSimply Sweet SaturdayShare it SaturdaySaturday Show and TellCraft Create InspireSunday ShowcaseThink PinkNifty Thrifty SundayNot Baaad SundayThat DIY PartyOverflowing with Creativity PartyA Bouquet of TalentWeekend Creative

Monday

Related Posts Plugin for WordPress, Blogger...