Last year was my dear friend's 30th birthday, the first of my friends to celebrate such a milestone. I really wanted to do something special with her to celebrate, unfortunately, I was a wee bit distracted as I was getting married the day before her wedding. Since I couldn't celebrate with her last year, I wanted to do something special for her this year for her birthday.
I chose to make her placemats for two reasons. 1) I know she loves owls and I was trying to think of something I could make that would use owl fabric that would be useful and 2) She received a set of beautiful placements at one of her bridal showers that I was at, so I knew she was a placement person :)

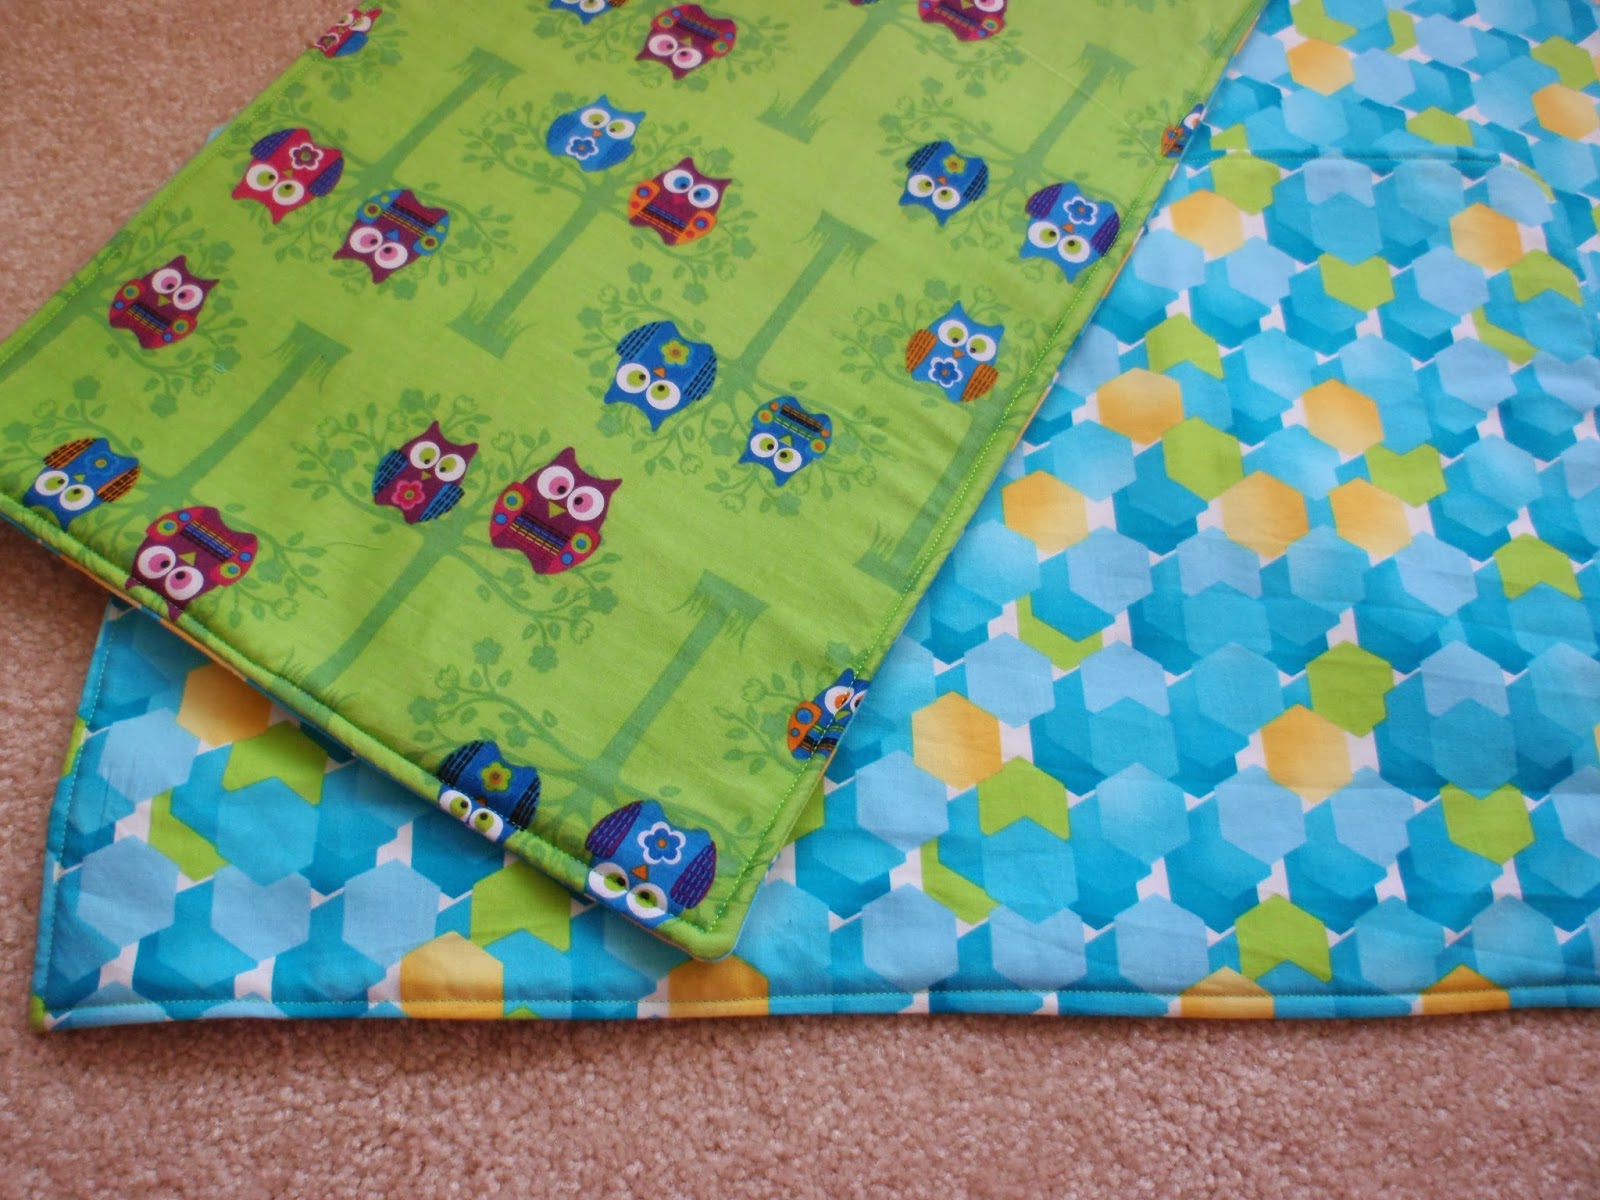
Then I was off on the hunt for some owl fabric. My fabric store options are fairly limited where I live, but I was able to find a fun owl print. I know the back side doesn't really match, but I wanted something a little more toned down that her husband would also enjoy.

These placements were fun and simple to make. Now that I've made a set for a friend, I just might have to make some for me with some fun holiday prints to add to my collection!
What you need:
- 3/4 yard of two coordinating fabrics
- 3/4 yard Pellon (or something stiffer to put in the middle)
- Matching tread
What you do:
Decide what size you want your placemats to be. I wanted mine to be fairly standard size/on the larger side.
Cut your fabric one inch larger than you want your finished placemat to be. I wanted to use my entire 3/4 of a yard of fabric, so I cut 4 pieces 19x13 (for finished placemats 18 inches by 12 inches)
Place your two fabrics right sides facing in. Lay the Pellon on top. Pin around the edges.
Using a 1/2 inch seam allowance, sew around all four edges of your placemat. Leave a 4 inch opening on one short side for turning. (I know this seems like a big seam allowance, but you really do want it this big!)


Top stitch, using a 1/4 inch seam allowance around all four edges. This is why it was important to have a 1/2 inch seam allowance. Top stitching will hold all of your layers in place, even with washing and will close the hole you used for turning.

I hope you enjoy making your own placemats! Either for yourself or as a gift. If you have any questions, let me know.
Have a great day!
Wednesday
Create and Share, Sugar and Spice, What I Whipped Up, Whatever Goes Wednesday, Show me what ya Got, Wow me Wednesday, {Wow Me} Wednesday, Cast Party, Your Whims Wednesday, Fluster's Creative Muster, Wednesday Whatsit, Show and Share, Dream to Reality, Wow Us Wednesday, A Little Bird Told Me, And Sew We Craft Together, We did it!, We Made that!, Two Girls and a PartyThursday
Catch a Glimpse, Chic and Crafty, Thursday Favorite Things, Live Laugh Linky, Creative Princess, Share your Cup, , Linky Party, Link it Up, Made you Look, Inspiration in Progress, Blog Stalking, Wildly Original, Showcase your Talent, Somewhat Simple, Keep Calm and Link Up, Five Little Chefs, Lamberts Lately
Friday
Show and Tell Friday, Friday Favorites, Simply Create, Lovely Crafty Weekend, Weekend Wander, Weekend Show Off, Weekend Bloggy Reading, Flaunt it Friday, 504 Main, Friday Favs, Fancy This Friday, Flash Blog Friday, Finished Friday, Freedom Friday, Show off Friday, Happy Hour, Keep Calm and Link Up, Weekend Wonders, I'm loving it, Friday Favs, Pity Party, Dare to Share, F Friday, Craftionary Link Party, Do Something Crafty, Get Crafty, Shine on Friday!
Weekend
Weekend Wrap Up, Saturday Spotlight, Strut Your Stuff, Check me Out , Show and Tell, Saturday Spotlight, Your Great Idea, Simply Sweet Saturday, Share it Saturday, Saturday Show and Tell, Craft Create Inspire, Sunday Showcase, Think Pink, Nifty Thrifty Sunday, Not Baaad Sunday, That DIY Party, Overflowing with Creativity Party, A Bouquet of Talent, Weekend Creative
Monday
A Round Tuit, Masterpiece Monday, Market Yourself Monday, Pink Hippo Party,Motivate Me Monday, Made by You Mondays, Made with Love, Craft-O-Manic Monday, Monday Funday, Sweet Sharing Monday, Marvelous Mondays, Make it Pretty, Mop It Up Monday, Busy Monday, I gotta try that, Mad Skills
Tuesday
Anti-Procrastination Tuesday, Homemade Tuesday, Nifty Thrifty Tuesday, Take a Look Tuesday, Too Cute Tuesday, One Project at a Time, Tasteful Tuesday, Tell me Tuesday, Trick or Treat Tuesday, Whatcha Whipped Up, Tuesday Talent Show, Two Cup Tuesday, Memories by the Mile, Totally Tasteful Tuesdays, Tuesday Confessional, Time for You Tuesday, Gathering Spot, Take it On Tuesday, You're Gonna Love it Tuesday, All my Bloggy Friends, Tuesday to Do, Pin it Tuesday

Hi Danielle, Thanks for sharing your tutorial. Your placements turned out nicely. Love the pattern. I am pinning. Thanks again, Have a great week.
ReplyDeleteA great gift idea. I love owls, too! I keep painting owls on my craft projects. lol Rhonda (http://feetgroundedontheeath.blogspot.com)
ReplyDeletePerfect timing for me. I wanted to make some placemats for my mom and wasn't 100% sure how to do it. Now I can follow your directions. Thanks so much!
ReplyDeleteThese look great, thanks for sharing!
ReplyDeleteAnd thanks for linking up to And Sew We Craft Together.
http://www.andsewwecraft.com/2013/11/sew-craft-together-linky-party-6/
Amy x
Homemade placemats are so fun. And you can choose the fabric of your choice. Thanks for sharing with SYC.
ReplyDeletehugs,
Jann
Wow :) awesome post regarding Placemats. We are also Manufacturer, Supplier and Exporter of Trendy Placemats
ReplyDeleteThese are neat but when I went to the fabric store, all the thicker home-decor fabric was dry-clean only. Are there kinds that can be machine washed? Thanks!
ReplyDeletegdsgfdghbfchgfjh
ReplyDeleteشركة تسليك مجاري بالدمام
dasfdcasdfdsfg
ReplyDeleteشركة تسليك مجاري بالدمام